BBQ 101 – Baby Back Ribs

Delicious, glazed BBRs!Once you have mastered the art of Smoking Bratwurst – it is time to up your game a little and try your hand at another BBQ staple: Baby Back Ribs!

A lot of people’s favorite food of the smoker, BBRs are not to be taken lightly. I like to make mine tender, but not fall-off-the-bone tender. A lot of (gruesome) chain restaurants have made people think that BBRs should be cooked (I believe they steam/braise them at most of those restaurants) so they can be eaten without teeth. I tend to disagree, and go more for the BBQ competition level of doneness, ie tender, but not doughy and fall-of-the-bone. Anyway, if you want fall-of-the-bone and/or do not have teeth, I will teach you how to do that too.
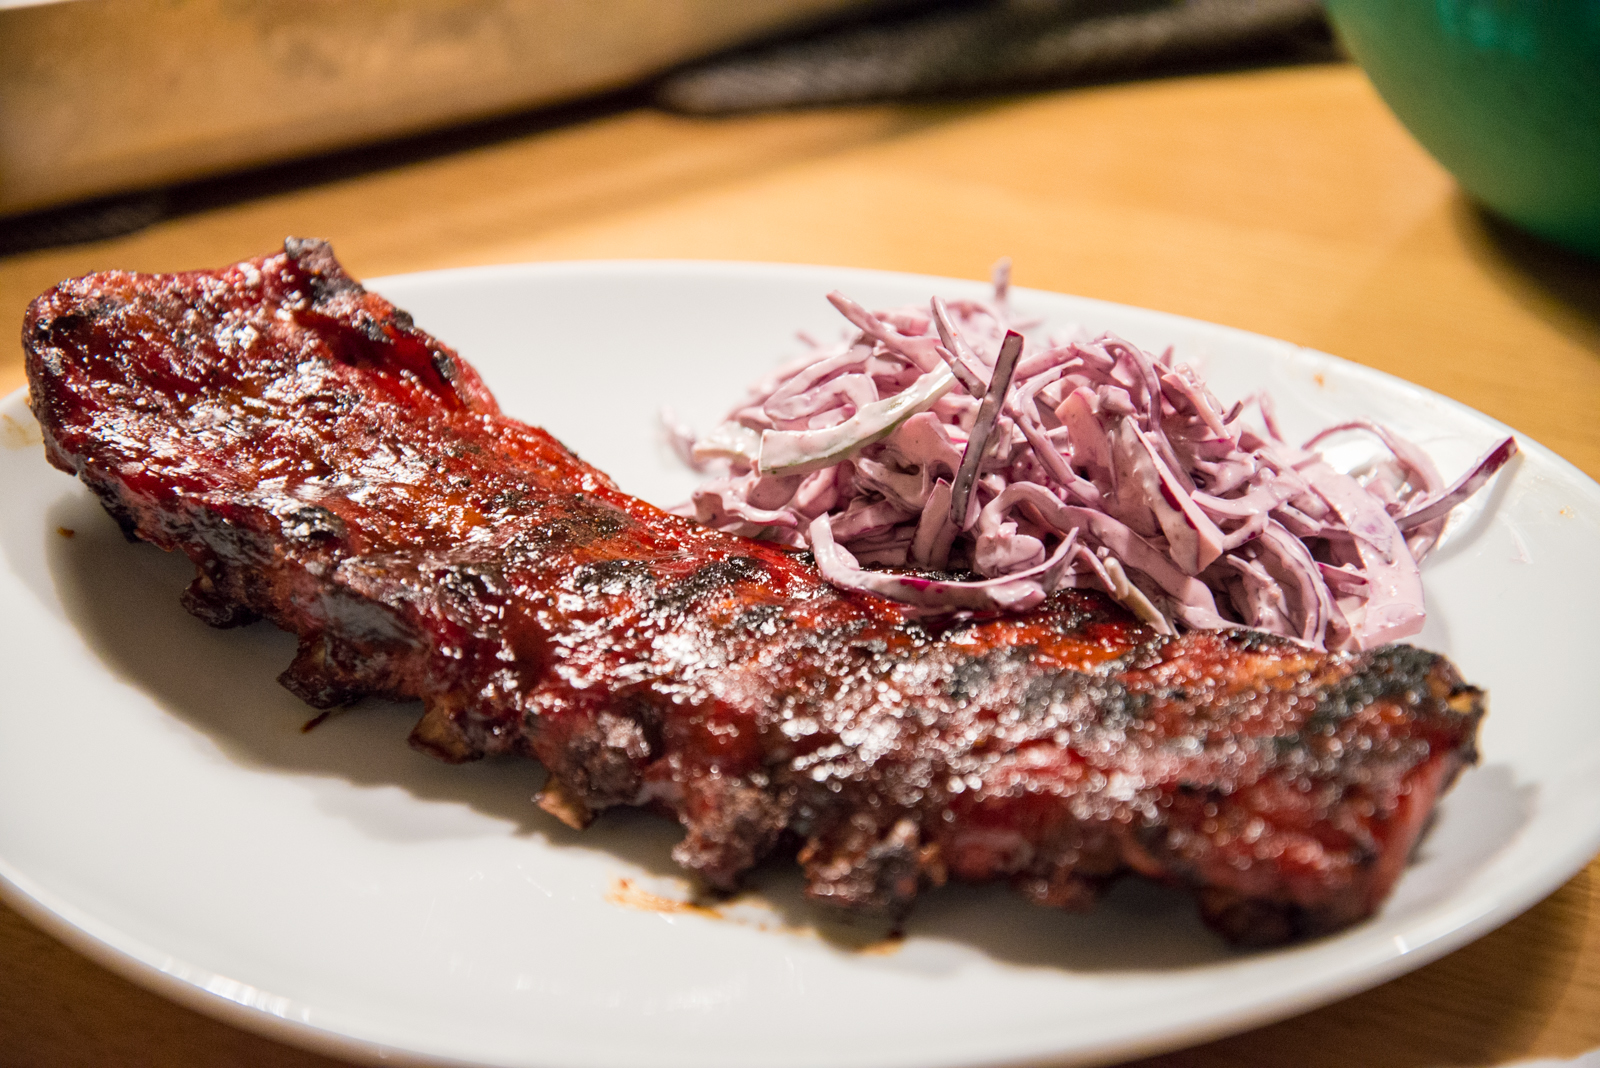
Serving suggestion:
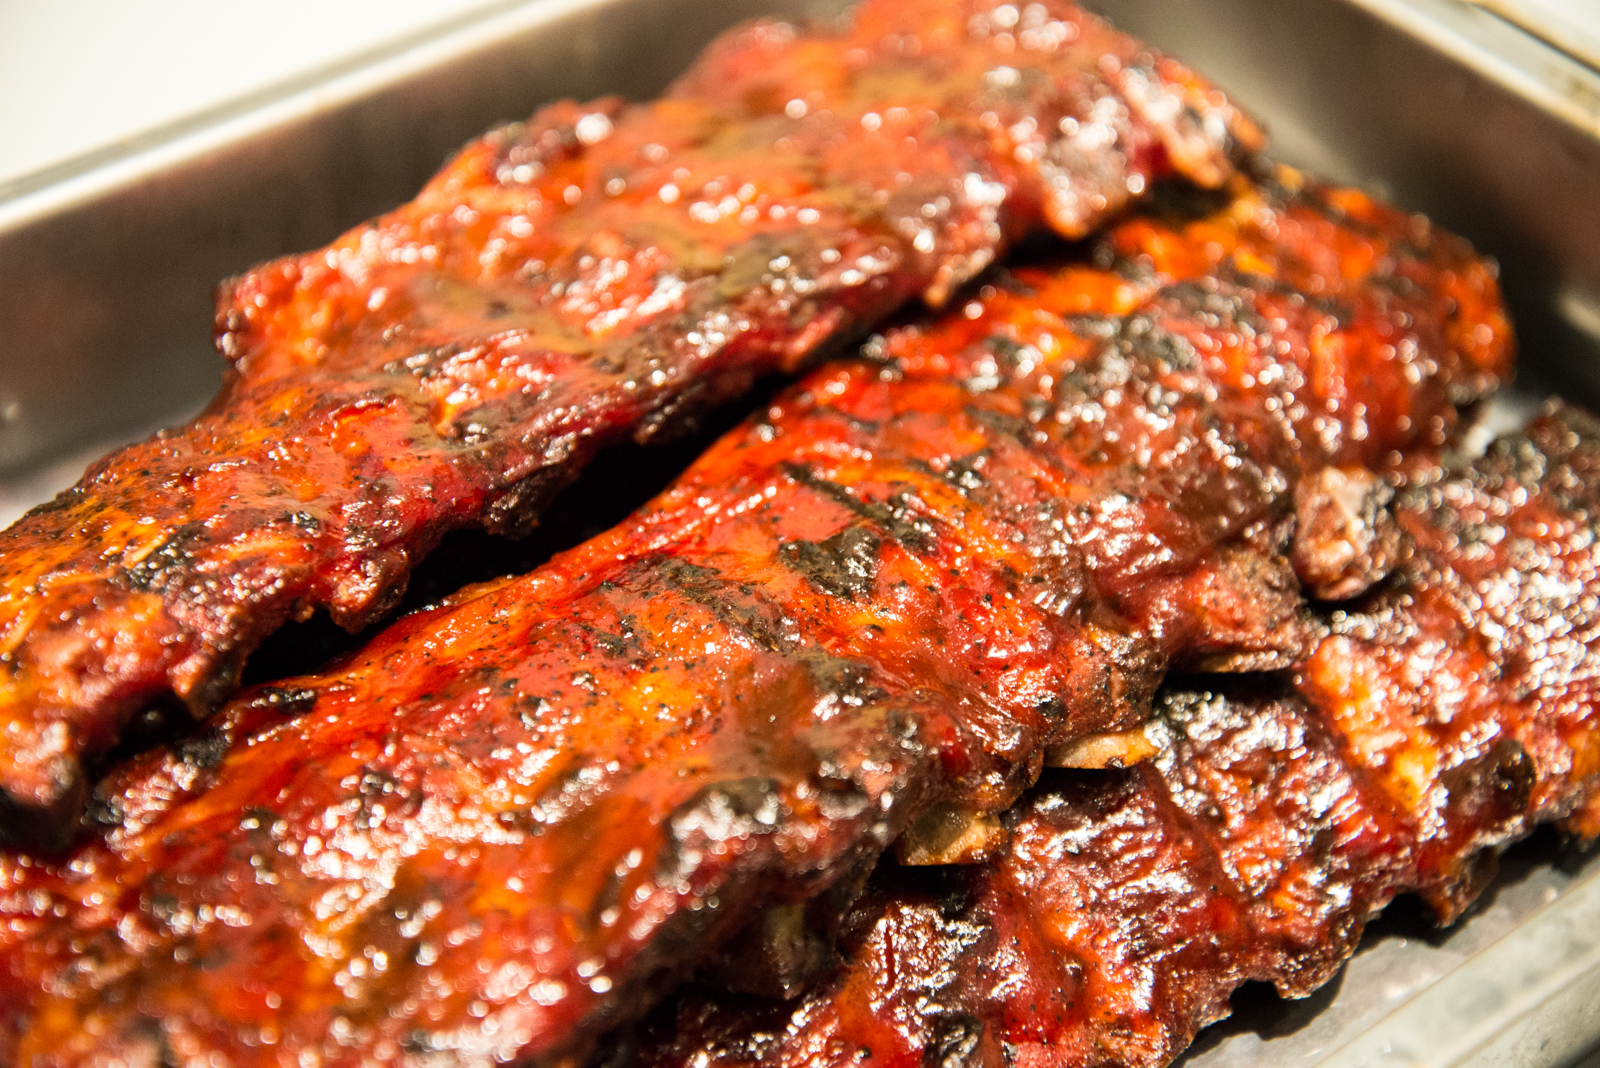
I like to serve my BBRs straight up with a coleslaw on the side and some homemade pickles. For this occasion photographed, I made my regular creamy coleslaw recipe but substitued regular cabbage with the red one for some interesting color combos. Some people like extra sweet and smoky bbq sauce on the side!

Total time: 3-5 hours
Skill level: Intermediate
Grilling method: Indirect, one-zone
Grill temperature: About 110-120 degrees centigrade (230-250F), more for the finishing

You’re going to need:

  • As many racks of ribs as there are people, at least. Some people can muster 1.5 racks too
  • A rib rack can be a nice way to fit more BBRs on your grill, they do take up a lot of space
  • Some lump charcoal or charcoal briquettes (make sure you get good ones with no chemicals and food starch as a binder)
  • 1 cup of wood smoking chips (I like to use apple or cherry for baby back ribs, read more about smoke wood here.)
  • An instant-read thermometer like a Thermapen is useful too
  • Your favorite BBQ rub – this one works well for ribs too.
  • Your favorite BBQ sauce for glazing at the end if you want to. I like a sweet and smoky style sauce for ribs, not too spicy. Your favorite store bought or homemade one will do!

How you do it:

  • We are going to use the three step method for doing BBRs. That means step 1 is BBRs, coleslaw and pickles. Who needs more? Hai, beer!smoking the ribs, step 2 is foiling and steaming, step 3 is finishing/glazing. This method is sometimes referred to as the 3-2-1 methods, where the numbers refer to number of hours in each step. Anywho – the goal is not to achieve 3, 2 and 1, but to achieve rib perfection, so your mileage on those may vary, but as a guideline it is sound.
  • Prep the baby back ribs by removing the membrane from the bone side. It’s very easy to do, check out a video over here if you don’t know how.
  • Fire up your grill or smoker and try to stabilize the temperature in the desired range of 110-120C (230-250F). On my Webers I will use a water pan to help me out in the stabilizing, it adds both mass and moisture inside the grill. On my Primo Grill I don’t really need that, and I also like to put the meat in when the grill is warming up, so it can get the maximum amount of smoke time. Remember to get good smoke going before putting in the meat.
  • Smoke the meat for as long it takes for the racks to reach 80-90C (175-195F)in the meatiest parts. The longer you spend on this step, the more smokey flavors.
  • Once they are smoked, it is time for step 2, the foiling and steaming of the ribs. Put them in a stainless steel pan on top of a rack, or on top of some crumbled up foil so they don’t touch the bottom, add a cup of water or apple juice, and cover with two layers of foil so it’s fairly airtight. Place the pan back on the grill.
  • Now for steaming time, this can take anything from 45-120 minutes. The best way to find out if they are finished is to check every 15 minutes towards the end. Take the foil off, wiggle the bones, pole them a little bit. When they are close to done, the meat should loosen from the bone with not too much effort. If you want them chain restaurant style, toothless done, they should start coming apart if you try to lift from one end.
  • Whenever your preferred doneness is achieved, take the pan of the grill, and DSC_1781increase the grill temp to about 150-160C (300-320F). This is the best temperature for the third and last step – finishing the ribs.
  • The reason you don’t go above 160C/320F for the finishing, is that at about 175C/350F, sugar will burn. This means your BBQ sauce and possibly your rub will turn from sweet to nasty in no time.
  • So, once stabilized at the new higher temp, lay out the ribs again, and brush them with a layer of your favorite BBQ sauce on both sides. Leave them on the indirect side 10 minutes, add another layer and flip, and leave them for another 10 minutes. After this they should have a nice, glossy laquer to them, and they should be finished, so serve it up!
  • ENJOY!

Grilled duck breast with winter vegetables

Grilled duck breast with winter vegetablesDuck breast is my wife’s favorite dinner. I can only agree, it’s got that light gamy flavor, and the duck fat is widely known to be bacon’s only challenger in the world of fats. All the fat on a duck breast also makes it perfect for grilling – because fat takes up a lot of smoky flavors. This is a nice and quick weeknight or weekend dinner, nothing fancy – but man it tastes good!

Serving suggestion:
This time I served it straight up like this, just the duck and the vegetables, but adding a little red onion compote probably won’t get you a lot of complaints either – it goes perfect with duck meat. If you want a sauce a simple balsamic reduction works really well too.

Total time: 60 minutes
Skill level: Beginner/Intermediate
Grilling method/setup: 50/50
Grill temperature: About 170-200 degrees centigrade (340-400F)

You’re going to need:

  • Duck breast – one per person might be a bit too much, usually two filets is enough for 3 people
  • Some sweet potatoes and some parsnips
  • Lemon infused olive oil (or just mix up some lemon juice and olive oil)
  • Some lump charcoal or charcoal briquettes (make sure you get good ones with no chemicals and food starch as a binder)
  • 1 cup of wood smoking chips (I used cherry wood and it worked well. Pretty sure apple or hickory would work too, go read more about smoke wood here.)
  • An instant-read thermometer like a Thermapen, or a leave-in probe style thermometer

Perfect medium rare duck breast and crispy fat. Mmmm...How you do it:

  • Fire up your chimney starter full of briquettes or lumps of charcoal (this is basedon my 22.5″ Weber kettle, and your mileage and/or method may vary on other grills and smokers)
  • While the charcoal gets ready, score the fatty side of the duck breasts with a sharp knife. The goal is to increase the surface area of the fat to ensure crispy fat and ease rendering, so a fairly tight diamond/cube pattern is best. Make sure you don’t cut all the way through the fat and into the meat.
  • Peel and dice parsnips and sweet potatoes, and put them in a perforated grill pan (like this one for instance),on a griddle or even some foil. I highly recommend getting a perforated grill pan of sorts, it is a useful tool.
  • Once the charcoal is ready, fill up one half of the grill with the charcoal, and leave the other half to be the “cold/indirect” zone. Throw some cherry wood chips on the coals at once, because you want smoke going for real when you put the cold duck breasts on for the first time.
  • Here is a neat trick: Put the duck breasts on instantly when the coal is in place, on a cold grate. Starting the duck breasts carefully/slowly, renders a lot more of the fat off than going direct to high heat, and rendering is necessary for that crisp finish you want on the fat side. It also means fewer flame-ups later on. I usually leave them like this for 7-8 minutes, to let a bit of the fat melt off. If you put a drip pan underneath, you might even be able to catch some fat for use on the vegetables.
  • After rendering some fat off, put the duck on a plate off the grill while you grill vegetables, let it rest a while.
  • Using the vegetable grill pan, fry up the vegetables directly over the coalswith duck fat and/or olive oil, turning over often with a spatula so nothing gets burnt. Gloves are nice to have.Once the vegetable are nicely browned, move them to the indirect side and cook with lid on for 20-30 minutes, turning them over every 5-6 minutes to get even cooking. When they’re done I usually stash them in the kitchen oven on low to keep warm while I focus on the meat.
  • Winter vegetables waiting for the star of the showNow it’s time for the fun part, sear the duck breast properly on both sides over direct heat. Be aware, there will be flame-ups, especially when searing fat side down. Just move them around, burnt food is never tasty.
  • Once seared check the internal temp using a Thermapen or other instant read thermometer. I like my duck at 55C (131F) which is sort of medium rare. If you want medium go to 60C (140F). If the duck isn’t finished after searing, put it on the cold side, lid on, and let it have another short round before checking again.
  • Let the duck breasts rest for at least 7-@8 minutes before cutting them in thin slices and serving.
  • Enjoy!

Which smoke wood to use when?

I get a lot of questions on which smoke wood to use for which foods. Here are some suggestions. Like anything else to do with BBQ, this is no exact science. And remember, what kind of rub or sauce you use and the spice level should also be part of the consideration.

Pork – Pork works well with lots of different smoke woods. I like to use almost anything for pork. I use mesquite a lot for pork, and I use apple (real good for ribs), cherry and pecan wood. Sometimes when I really want smoke taste on pork butts, I use hickory as well. Want something light? Try Alder.

Beef – Beef=hickory in my mind. Sometimes I’ll mix 50/50 hickory and mesquite. Oak is also good, the Jack Daniel’s oak wood chips are great for steaks for instance.

Poultry – For poultry I would normally pick something lighter, like cherry or apple. Sometimes I use mesquite, it can be real tasty with duck, which has a stronger, more gamey taste than chickens

Fish – Oak or alder is very popular for smoking fish. Here in Norway the juniper bush is sometimes used, but I find the taste too owerpowering.

Vegetables – Since they’re not the stars of the show, my vegetables usually get smoked with whatever I’m using for the meat. Hickory and mesquite is great for baked potatoes and ears of corn (prick the potatoes with a fork first).

Lastly, experiment. A lot. It’s the only way to learn what’s best for your tastes. There’s also other ways to make smoke, rosemary smoke from fresh rosemary for lamb for instance. Vines of various kinds can also be used. But don’t use fresh wood, it needs to be dried. Nothing green should go on the grill as smoke wood.