BBQ Grunnkurs – Røkt Bratwurst

Smoked bratwurst is great "waiting food" if you've got some spare room and you're doing a long cook.

Røykt bratwurst er perfekt ventemat hvis du har litt ledig plass i grillen og driver med ett langtidsprosjekt som for eksempel pulled pork

Så du har grillet en stund, og vil prøve deg på ekte “low & slow” BBQ? Da er dette det definitive stedet å begynne!

For mange betyr det å fyre opp grillen en ting: pølser. Det som ikke er så bra er at pølser ofte betyr kjedelige, usmakelige, ferdigkokte gufne greier fra en eller annen fabrikkprodusent. Jeg blir svimmel bare jeg ser på ingredienselisten til enkelte grillpølser man kan finne hos de store butikkkjedene. En god pølse skal stort sett inneholde tre ting: kjøtt, fett, og krydder. Og en god pølse skal deifnitivt ikke være ferdig trekt/kokt på fabrikk. Når du først har smakt pølser som var rå da de ble lagt på, og så har fått røyke sakte på grillen i ett par timer kommer du til å være kurert for å spise vanlige grillpølser, det er helt sikkert. Hvorfor skal pølser være ferdig trekt? Ville du kjøpt en ferdigstekt biff til å varme på grillen? Ferdig kokt svineskulder? Ferdig kokte spareribs? Hvis du alt dette høres flott ut, er du på feil blogg. Så, som utgangspunkt trenger vi rå pølser. I Oslo fås min favoritt, rå bratwurst, hos Strøm-Larsen. Men sommeren 2014 selges også rå pølser i vanlige butikker over det ganske land. Kvaliteten er ikke helt som Strøm-Larsen sine, men de er uendelig mye mer smakfulle enn sine ferdig trekte søsken i pølsedisken. Anni’s Pølsemakeri i Mathallen har også ett bra utvalg.

Serveringsforslag:

Jeg serverer disse pølsene på hjemmelagde burgerbrød, med litt coleslaw, pickles, litt hjemmelaget ketchup, en god hjemmelaget sennep, og noen ganger også litt rødløkskompott. Denne kålsalaten med grønne epler er også perfekt til pølsene!

Total tid: 90-120 minutes
Vanskelighetsgrad: Nybegynner/Middels
Grilloppsett: Indirekte, en-sone
Grill temperature: Cirka 110-120 grader celsius på risten

Du trenger:

  • Rå kvalitetspølser (bedre med for mange enn for få, restene fungerer nydelig til omelett eller frokost neste dag)
  • Rundstykker eller brød (hjemmelaget er selvsagt best)
  • Tilbehør som nevnt over
  • Grillkull eller briketter (jeg bruker kun naturlig kull, hvis du bruker briketter sørg for at du bruker noen av god kvalitet)
  • 1 kopp med røykflis (Jeg liker å blande hickory og eple til disse pølsene, les mer om valg av røykflis her)
  • Ett hurtig termometer, som for eksempel ThermaPen

Fremgangsmåte:

  • Fyr opp skorsteinen din ca. halvfull med briketter eller kull (basert på standard Weber kulegrill)
  • Mens kullet blir klart, putter du en brikettkurv på ene siden av grillen, og en stor rustfri stålpanne full av vann i midten av grillen (se bildet). Du kan også bruke engangs grillpanne, men det er både mer økonomisk og mer miljøvennlig å kjøpe seg en stålpanne som kan brukes igjen og igjen (de har en billig en på Ikea). Hvorfor vi skal ha vann på grillen? For det første gjør massen i vannet at det er letter å holde jevn temperatur når man røyker, for det andre bidrar vannet til å holde miljøet fuktig i grillen gjennom hele røykingen.

    The setup for smoked brats. A great place to start when you're getting into BBQ style grilling.

    Oppsett for røykt bratwurst. Liten kurv med kull på ene siden, og røykflis som har ligget i bløt og så pakkes i alufolie.

  • Når kullet er hvitt, heller du det over i brikettkurven på grillen.
  • Putt to røykbomber (en håndfull bløtlagt røykflis pakket i aluminiumsfolie) over det glødende kullet. Vent til de begynner å produsere røyk før du legger på pølsene.
  • Legg på pølsene og lukk lokket. Bruk nederste ventil til å justere temperaturen, prøv å holde den rundt 110-120 grader.
  • Legg på nye røykbomber nå det slutter å røyke, men ellers bør lokket være på mest mulig, ingen sniktitting!
  • The brats are ready to. Look at the fantastic coloration from the smoke. Oh man!

    Slik ser pølsene ut når de er klare til å spises. Se den nydelige fargen pølsene får av røyken fra flisen!

    Etter ca. 60-90 minutter burde pølsene være klare. Hvis en av dem sprekker, har du for høy temperatur, lukk nederste ventil helt og la temperaturen synke, og hold lokket på. Bruk ThermaPen til å sjekke temperaturen, det er viktig at rå pølser er gjennomstekt! Jeg pleier steke mine til 85 grader celsius, de er fortsatt ekstremt saftige og gode på grunn av den lave grilltemperaturen.

  • Da er det bare å spise da!
Advertisement

BBQ 101 – Smoked leg of lamb

DSC_1977Lamb season is fast approaching here in Norway, and bone-in leg of lamb is my favorite. I know boneless is just as good, and butterflied is much quicker, but nothing beats the visual impact of a big chunk of meat with the bone still in it for me. Maybe it’s my Nordic genes, or maybe it’s the caveman or woman in all of us wanting some satisfaction? Anyhow, I will use bone-in for this recipe, it’s just more fun that way, plus the bone-in version has to great other features: Firstly, a nice handle for turning the meat in the form of a bone, secondly a litttle chef’s snack muscle towards to thin end of the bone. So there, bone-in wins for me, every time. Note: I have to excuse the lack of a photo of the plated food in this post, but sometimes the food is so good and I am so hungry that I forget. So enjoy a ton of pics of the lamb on the grill instead…. 😀

Serving suggestion:
I like to serve leg of lamb spiced in the mediterranean way, with an aubergine purée, some red onion compote and some freshly grilled greens. You can make a sauce too from the drippings.

2014-03-28 19.53.49-1Total time: 5-8 hours, marinating the day before if you want to
Skill level: Beginner/Intermediate
Grilling method: Indirect, one-zone
Grill temperature: About 110-120 degrees centigrade (230-250F), or even lowe if you can manage

You’re going to need:

  • A leg of lamb per four people should be about right, depending on how big they are
  • Rosemary, lots of rosemary
  • Garlic, lots of garlic
  • A lemon
  • Honey
  • Mustard, a homemade one is of course best
  • Good olive oil
  • Cayenne pepper

How you do it the day before:

  • If you want to marinate the meat, you should start the day before. Mix up lemon, rosemary, honey, lots of crushed garlic, some mustard and a good olive oil in a blender. Add salt and pepper to taste, and some cayenne pepper if you want some heat (I always do)
  • If you’re lucky enough to have one of those fancy vacuum machines like I do, throw the leg in a bag with the marinade and vacuum it up, leaving it in the fridge overnight. If not, use a plastic bag, and try to cover it well in the marinade before wrapping it up and putting in the fridge.

DSC_1981How you do it on BBQ day:

  • Fire up your grill, and set it up for
  •  indirect, low and slow cooking with some coals on one side, and place for the met on the other. If you want to make sauce, you’re going to need a drip pan to put under the meat to catch drippings
  • If you didn’t marinate the night before, go up a couple steps, make the marinade mix and get the meat slathered in that stuff before you put the meat on the grill. If you did, take the meat out of the bag, but save up the marinade leftovers for later.
  • Remember to get the smoke going before putting the meat on. I like to mix rosemary branches with hickory for lamb smoking.
  • Add some water to your drip pan. Not a lot, this is just to keep the drippings from burning, remember you will make that into a sauce later.
  • Add a temperature probe to the meatiest part of the leg, and add another one to the grill grate to monitor grill temperature. You don’t have a two-probe style wireless thermometer yet you say? Go and get yourself one. I have been using the Maverick ET-732 for a couple years, and it works quite well.
  • Keep the grill low and slow for hours, keeping an eye on meat and grill temp. Add aRoasted aubergine. Not quite done yet. cup of water to the drip pan if it runs out, and add coals if you need to (I don’t anymore thanks to my lovely new Primo Oval XL)
  • Once the meat reaches an internal temperature of exactly 68C (155F), take it off the grill, wrap it in a double layer of aluminium foil, and wrap that in a plastic bag, then a couple towels. Ideally you want to rest the leg for at least one hour, but if you’re done well ahead of dinner, resting it for 2-3 or even 4 hours is not a problem at all.
  • Take out the drip pan, put the sauce in a pot, and make a delicious sauce. Adding some red wine, salt and pepper to taste and reducing until you have the desired consistency is a good idea. If the sauce is too sharp, some honey might be able to help you out.
  • While you wait for the guest to arrive, you can make the sides, like aubergine purée and some red onion compote
  • When you are about ready to serve, fire the grill up for direct cooking at a temp of about 150-160C (300-320F), brush the leg with any marinade leftovers, and finish the leg off over direct heat. The goal here is to get a nice sear before serving, and crisping up the outside.
  • Let the lamb rest for 5-10 minutes again, while you grill up some fresh spring oninon and/or asparagus. Serve and enjoy!DSC_1988

BBQ 101 – Smoked Bratwurst

Smoked bratwurst is great "waiting food" if you've got some spare room and you're doing a long cook.

Smoked bratwurst is great “waiting food” if you’ve got some spare room and you’re doing a long cook.

So you’ve been grilling a little, and want to try your hand at low & slow style BBQ. This is the definitive place to start!

For a lot of people firing up the grill means hot dogs. Which is great. What is not so great, is that it all too often also means bland, cheap, mystery meat pre-boiled sausages with about 20+ ingredients in them. A good sausage should have three basic ingredients: Meat, fat, and spices (and a casing of course). No preservatives, potato flour or corn starch. No secret chemicals. And once you’ve tasted slow-smoked sausages that were uncooked when you started, you’re never going back to pre-boiled ones. Would you buy pre-boiled ribs? Pre-boiled pork butt? If you would, please step away from my blog. So, either make yourself some sausages, or head down to your local butcher or quality food store and get you some of the real stuff. They’re much more filling too, so instead of eating five, you might eat two. In this recipe I like to use raw bratwurst from my local sausagemaker / butcher shop here in Oslo, Strøm-Larsen. One of few places in Oslo that sell uncooked sausage.

Serving suggestion:
I serve these sausages with homemade hamburger buns, a creamy coleslaw,  some pickled gherkins, some homemade ketchup, some quality mustard and sometimes also a little red onion compote.

Total time: 90 minutes
Skill level: Beginner/Intermediate
Grilling method: Indirect, one-zone
Grill temperature: About 110-120 degrees centigrade (230-250F)

You’re going to need:

  • Quality uncooked bratwurst, chorizo or other uncooked sausages.
  • Some form of bun or bread
  • Condiments as mentioned above
  • Some lump charcoal or charcoal briquettes (make sure you get good ones with no chemicals and food starch as a binder)
  • 1 cup of wood smoking chips (I like to mix hickory and some apple or cherry for sausages, read more about smoke wood here.)
  • An instant-read thermometer like a Thermapen, or a leave-in probe style thermometer

How you do it:

  • Fire up your chimney starter with 20 briquettes or lumps of charcoal (this is based
    The setup for smoked brats. A great place to start when you're getting into BBQ style grilling.

    The setup for smoked brats. A great place to start when you’re getting into BBQ style grilling.

    on my 22.5″ Weber kettle, and your mileage and/or method may vary on other grills and smokers)

  • In the meantime, put a briquette basket on one side of the grill only, and a big water pan covering the whole middle part of the grill. Why water you say? The mass of water (I use a stainless steel pan from Ikea that holds about 4-5 liters or one US gallon) helps me maintain a steady temperature inside the kettle, because water stores (in this case) heat pretty well. It also helps the meat retain its moisture during the long cook by increasing the general moisture in the cooking environment.
  • When your briquettes are white hot, put them in the briquette basket you put on the one side of the grill.
  • Put two smokebombs (a handful of soaked wood chips wrapped in aluminium foil) on the briquettes. Putting them out towards the edge of the fire makes them last longer. Wait 5-10 minutes until they start smoking. Replace these as often as you please once they are smoked out. This is especially important the first 4 hours, after that the meat won’t really soak up the smoky flavours anymore.
  • Put the grate on, sausages away from the fire on the opposite side, put the lid on
  • Refill with wood chips when it stops smoking
  • The brats are ready to. Look at the fantastic coloration from the smoke. Oh man!

    The brats are ready to. Look at the fantastic coloration from the smoke. Oh man!

    After about 60-90 minutes sausages should be ready. If one of them bursts, you’re running too hot. Don’t do that. Use your thermapen to check the temperature, uncooked sausage HAS TO be cooked all the way through, ground meat is something you don’t serve rare. I usually take them off the grill when they’re at 85C/185F

  • Enjoy!

Great winter BBQ activity: Cold-smoke some cheese on your kettle!

Ecological Brie, Camembert, some Port Salut, and some mature Cheddar, ready for the smoker.

Ecological Brie, Camembert, some Port Salut, and some mature Cheddar, ready for the smoker.

I’m a big fan of the French kitchen, and I’m also a big fan of go big or go home. And what could be more gluttonous and over the top than going with a nice plate (or cart if you have one) of cheese for dessert after a BBQ feast? You tell me. Anyhow, it’s cold here now, freezing every single day, so it’s real easy to keep the kettle low in temperatures. This makes the weather perfect for smoking some cheese, because you really don’t want it to melt all up in your kettle now, do you? This was my first go at smoking cheese, so I bought some different ones they had at the local supermarket, just to do a test. In the pic above you can see the candidates, and since most of you don’t know Norwegian, I will explain. There are two soft cheeses, both Norwegian, ecological versions of French staples Brie and Camembert. Then there’s a Norwegian version of Port Salut, and a good Mature Cheddar from England. A hot tip btw is taking a picture like this of your arrangement, so you know which cheese is which when they come back in the kitchen. Take note that the cheese will taste best if you do the smoking some time before eating. I did it the day before, and they came out great. We found the hard cheeses came out best, which makes sense since the soft ones have this protective layer on the outside. Maybe next time I’ll try slicing the soft ones lengthwise into two circular “bowls” and see if that makes them smokier. A lot of people recommend Pepper Jack and Monterey Jack cheeses, so if you can find those where you’re at – I’d go for those! Gouda should also be a good alternative.

This is what they looked like after 2 hours of cold-smoking using hickory chips

This is what they looked like after 2 hours of cold-smoking using hickory chips

What you need:

  • Cheese for smoking
  • Some lump charcoal, or briquettes
  • Smoking wood chips (I used Hickory, but Pecan or others should be great for this too)
  • Honey, maple syrup, dried fruit and some crackers could be useful for serving. For drinks I’d go with some strong, sweet Trappist style craft beer (Chimay, Rochefort), or some dessert wine.

Preparations:

  • Make a very small fire on your kettle all the way off to one side. Make it as small as possible, just enough to keep the chips smoking. As the goal here is cold-smoking, this would best be done in winter, and if the sun is shining, keep the kettle in the shade!

The setup for cold-smoking cheese

How to do it:

  • Unwrap cheese
  • Place on cold side of smoker on a clean rack
  • Make sure you keep the smoke going all the time. I smoked the cheese for about 2 hours, and it seemed about right
  • I mellowed the cheese in the fridge overnight, wrapped in plastic. Some people claim the smoke flavour will spread better through the cheese after a couple of days or even a week. Didn’t have time to test this claim yet, but if you do, let me know what you think!
  • Remember to take your cheeses out of the fridge a couple of hours before eating, fridge-cold cheese is not awesome.
  • Enjoy!

Deliciousness!

BBQ 101 – Pulled Pork

Homemade coleslaw and pulled pork sandwich. Ah yeh…

Pork butt is a fantastic piece of meat. It’s quite a tough cut, with a lot of collagen (and fat), which makes it perfect for low and slow BBQ. If you can’t get pork butt where you live, you can try a boned-out ham. However, the best cut for this is the pork butt which is essentially the upper part of the pork shoulder ham cut, here in Norway not a regular cut, but when I tell my butcher I want the upper part of the ham, basically the shoulder-blade, with all the meat and fat on it, I get the right thing. Keeping the bone in there helps the meat become more juicy because the bones contains gelatine, so I always get bone-in when I can. Gives you that lip-smacking goodness feel you get from good ribs. Guess that’s why gelatine is used a lot for making candy, huh… That goes for any meat – bone-in = better. Talk to your butcher and show him some charts and google images, and I’m sure you’ll get it right. Now, to get a historical fact out of the way, they’re not called butts because they’re from the butt (because they’re from the shoulder end of the pig really..), but because this cut was stored in special barrels known as butts, in the olden days. Read more on Wikipedia.

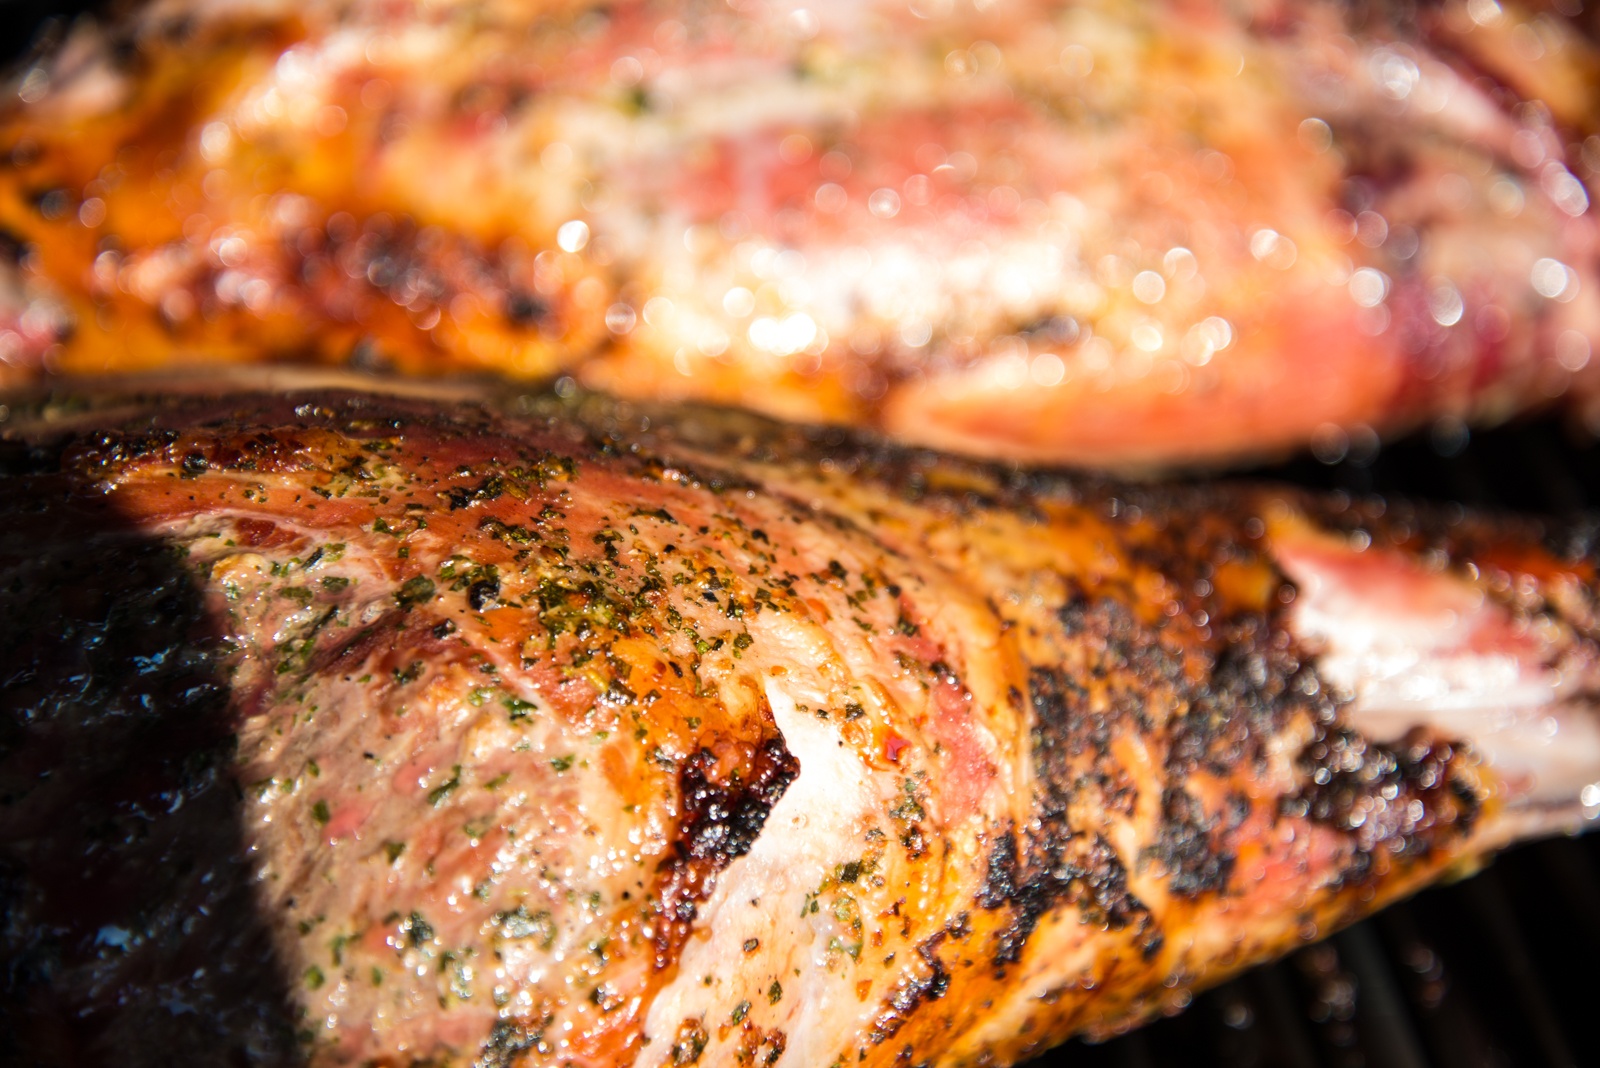
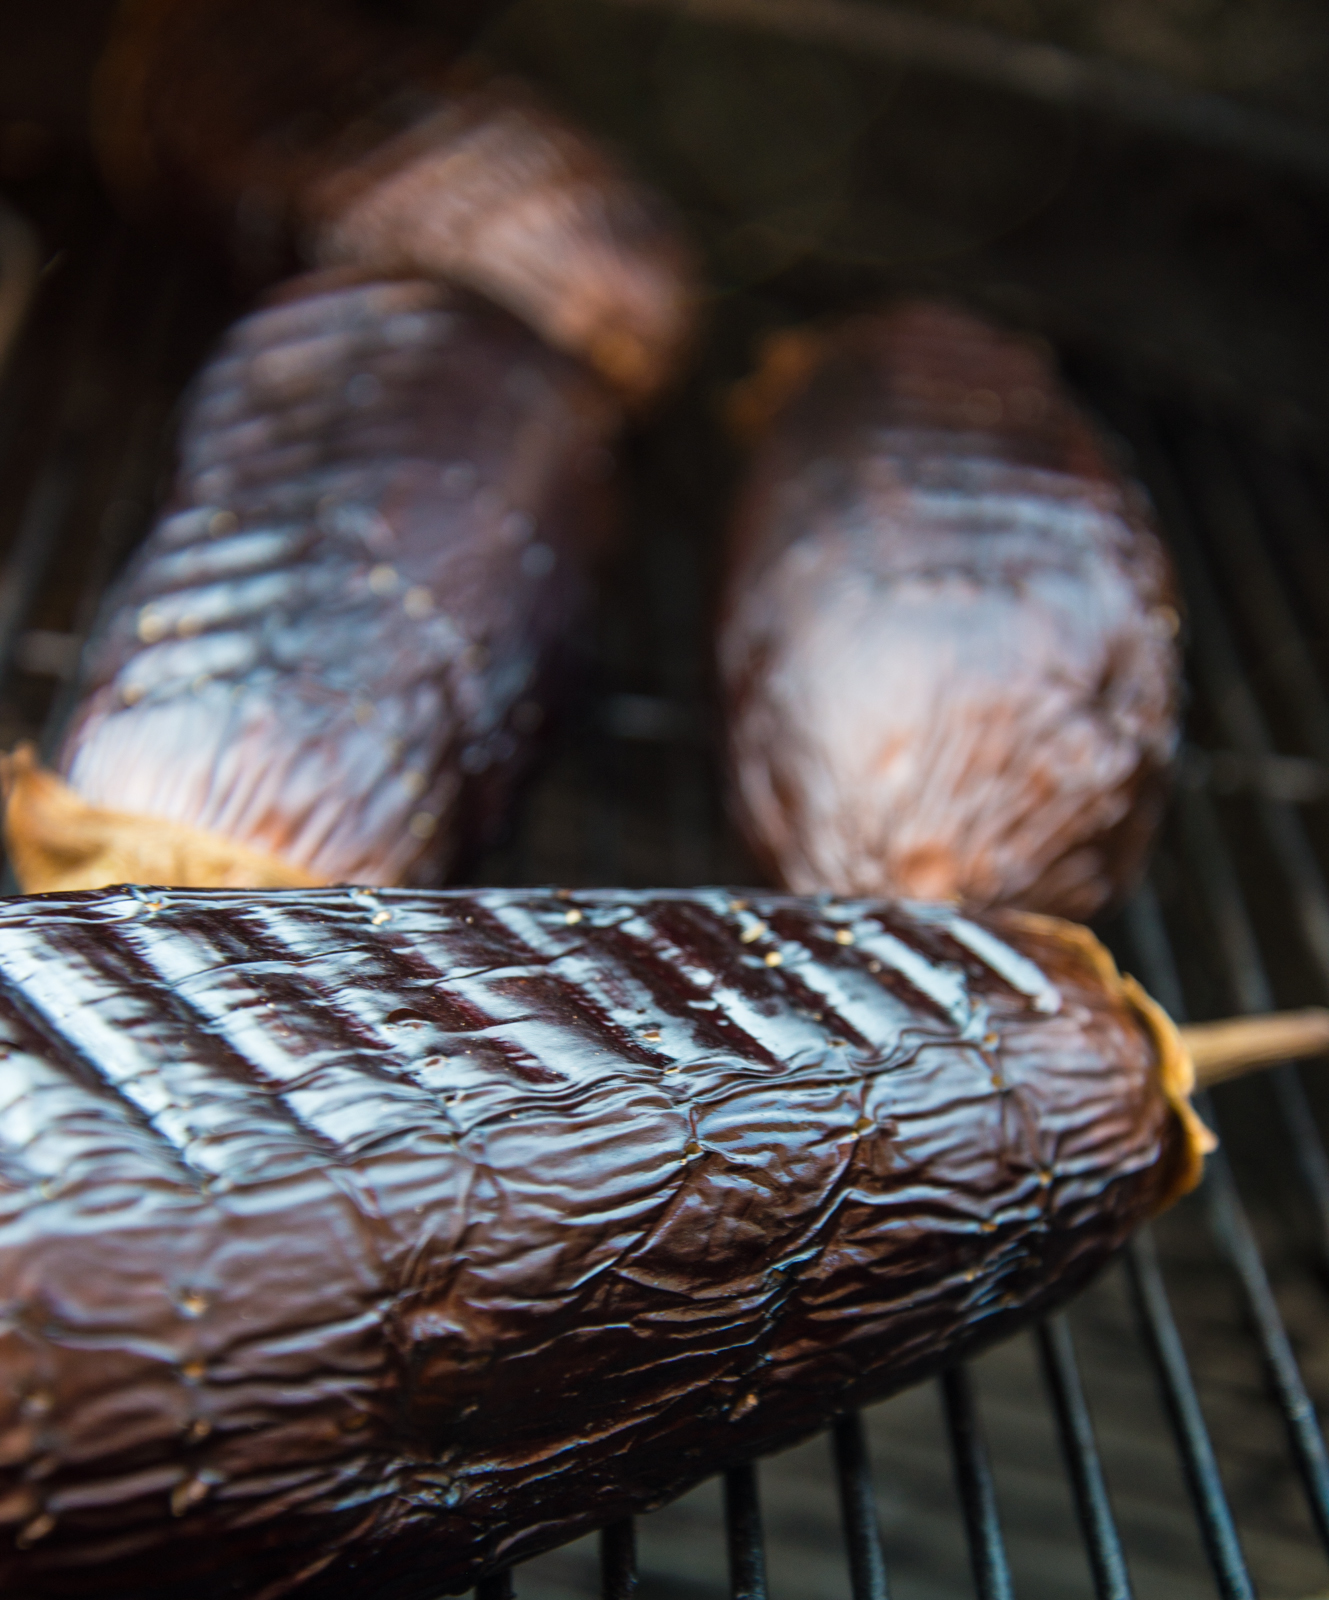
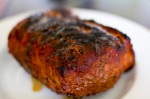
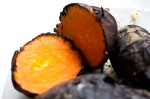
Pork butts ready for pullin’

This is not a good place to start for the novice griller, but if you think you’ve got indirect grilling and temperature control on your kettle or smoker down, you should try it. Pork butt is some of the best eats to ever come out of a BBQ, and it’s a cheap cut, which enables you to feed tons of people for little money. Time for a party, in other words. Let’s get to it.

Serving suggestion:
I serve this dish in a very traditional manner, on homemade hamburger buns, with a creamy coleslaw, a basic Eastern North Carolina style vinegar sauce, and some pickled gherkins. Don’t make it complicated, the meat should be the star.

Total time: 10-14 hours (prep starts the day before)
Skill level: Intermediate/Expert
Grilling method: Indirect, one-zone (some coals on one side, large drip pan filled with water under the meat)
Grill temperature: About 120-140 degrees centigrade (250-285F)

You’re going to need:

  • Time, I usually start around 6-7 AM when I do this and we eat around 7-8 PM. A great excuse to drink beer and “mind the bbq” all day, in other words. Kinda like fishing or golf in that regard (dads will know what I mean…)
  • 2 pork butts (I always make two, because that’s what I have room for on my kettle. Pulled pork freezes well, so if I have leftovers, that just means my wife is going to be happy for the next few weeks eating pulled pork sandwiches..)
  • 1 cup of your favourite all-round spice rub
  • Some yellow American mustard (to be used as a glue)
  • 1-2 bags of charcoal briquettes (make sure you get good ones with no chemicals and food starch as a binder)
  • 4-5 cups of wood smoking chips (I like to mix hickory and some mesquite for pulled pork, read more about smoke wood here. Apple wood is also great)
  • A notebook and a pen, for taking notes during the process
  • An instant-read thermometer like a Thermapen, or a leave-in probe style thermometer

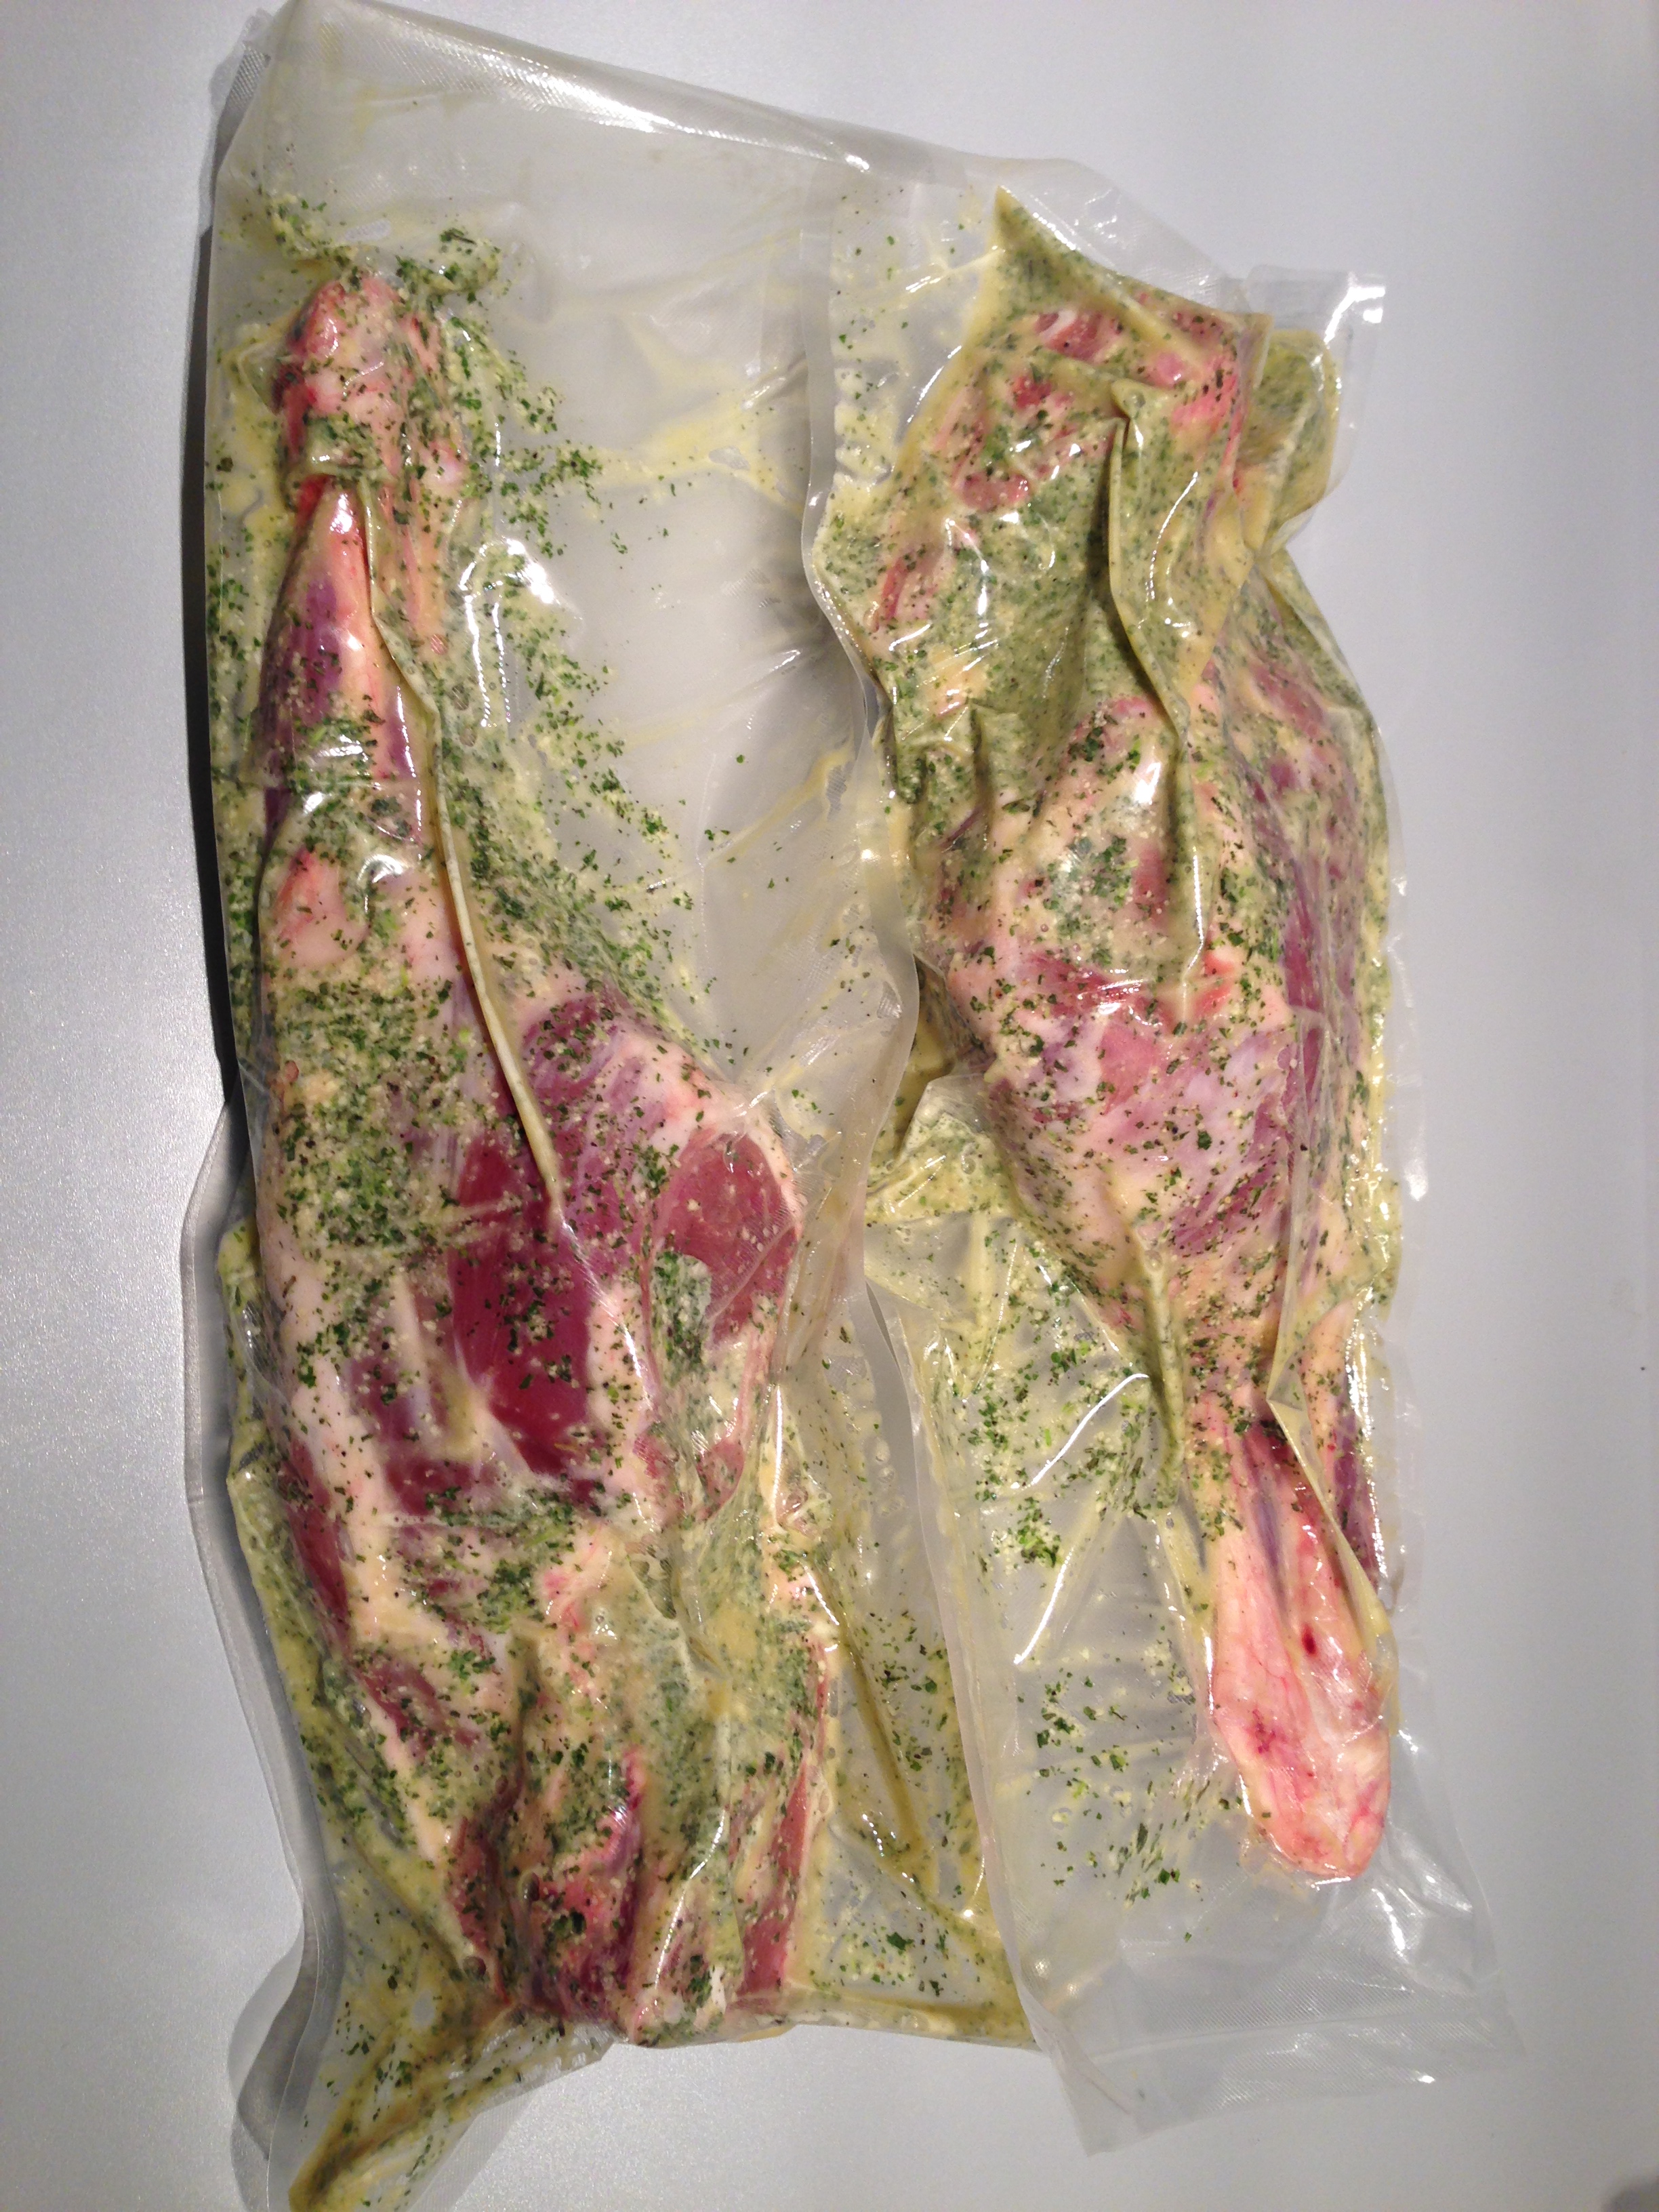
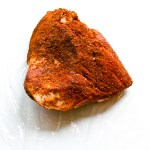
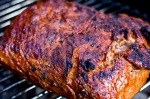
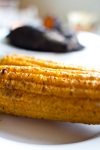
Pork butt, rubbed and ready to go

How you do it, the night before:

  • Prep should ideally start the day before. Cut the skin off the butts unless your butcher did it, but leave a good thick layer of fat on the meat
  • Lay out some lengths of plastic wrap on your workspace, and put a pork butt on there. Put a thin layer of yellow mustard on it, and apply generous amounts of spice rub all around it. I use about 0.5 cup for each butt
  • Wrap in several layers of plastic wrap, and repeat.
  • I store my butts overnight in the fridge. It’s (almost) always a good idea to room temper your meat before it goes on the grill, as long as you’re able to do it in a safe, hygienic manner. However, if you want to maximize your smoke penetration and smoke ring size, you should go straight from the fridge on this one. Experienced BBQ’ers tell me the smoke ring only happens when the meat is below 60 degrees centigrade (140F)

How you do it, cooking day:

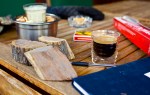
  • Taking notes is paramount if you want to learn

    Fire up your chimney starter with 20 briquettes (this is based on my 22.5″ Weber kettle, and your mileage and/or method may vary on other grills and smokers)

  • In the meantime, put a briquette basket on one side of the grill only, and a big water pan covering the whole middle part of the grill. Why water you say? The mass of water (I use a stainless steel pan from Ikea that holds about 4-5 liters or one US gallon) helps me maintain a steady temperature inside the kettle, because water stores (in this case) heat pretty well. It also helps the meat retain its moisture during the long cook by increasing the general moisture in the cooking environment.
  • When your briquettes are white hot, put them in the briquette basket you put on the one side of the grill.
  • Put two smokebombs (a handful of soaked wood chips wrapped in aluminium foil) on the briquettes. Putting them out towards the edge of the fire makes them last longer. Wait 5-10 minutes until they start smoking. Replace these as often as you please once they are smoked out. This is especially important the first 4 hours, after that the meat won’t really soak up the smoky flavours anymore.
  • Put the grate on, pork butts on the grate away from the fire, and put the lid on
  • Next is 10-12 hours of temperature watch. You should try to adjust your temperature using only the bottom vent(s) on your grill. The top one should stay at least 50% open. If you close the top one too much, you can get a soot buildup, which will not taste nice.
  • Eventually, usually after 4-6 hours you may run into something BBQ’ers call “the stall” – The temp of the pork butt will stabilize or plateau at about 68-70 degrees C (154-158F) – sometimes it will even drop a little. This can go on for hours and really f up your dinner schedule. Read up on the stall in this great article, it’s got useful, common sense information you need to be aware of if you do low and slow.
  • A lot can be said on how to do this on a kettle style grill, but it should be possible. However, there are a lot of factors that come into play when doing a long cook on a kettle or smoke. Wind. Rain. Sun. Shade. Air temperature. Humidity. Which is what makes this fun, and exciting, and a skill that is learned from experience.
  • If it gets too hot, I take my tongs and dump a briquette or two right in the water pan. You can take them out too of course, just don’t put them on your wooden deck…
  • If it gets too cold, you might need more briquettes. I put in 6-8 unlit briquettes every hour when I do this. If you get a strange dip in temp and really need to knock it up quickly, you can use unsoaked wood chips or chunks, or you can put on some lump charcoal which burns a lot hotter than briquettes. Just be patient and don’t overdo it.
  • I will not go on in lengths on all the different ways to get there, you shold keep a log of times, kettle lid temp and meat temp, so you’ll have something to learn from for your next cook. The important part is to have fun, and reach a target temp of about 87-90 degrees centigrade (that’s 190-195F). The other important part, is to get there slowly.
  • If you get to the target temp too early, don’t worry. Wrap the meat in aluminium foil, and a couple of kitchen towels, and put it all in a cooler, and it will stay warm enough for hours.
  • When you’re ready to serve, it’s time to pull the pork. If you did everything right, it

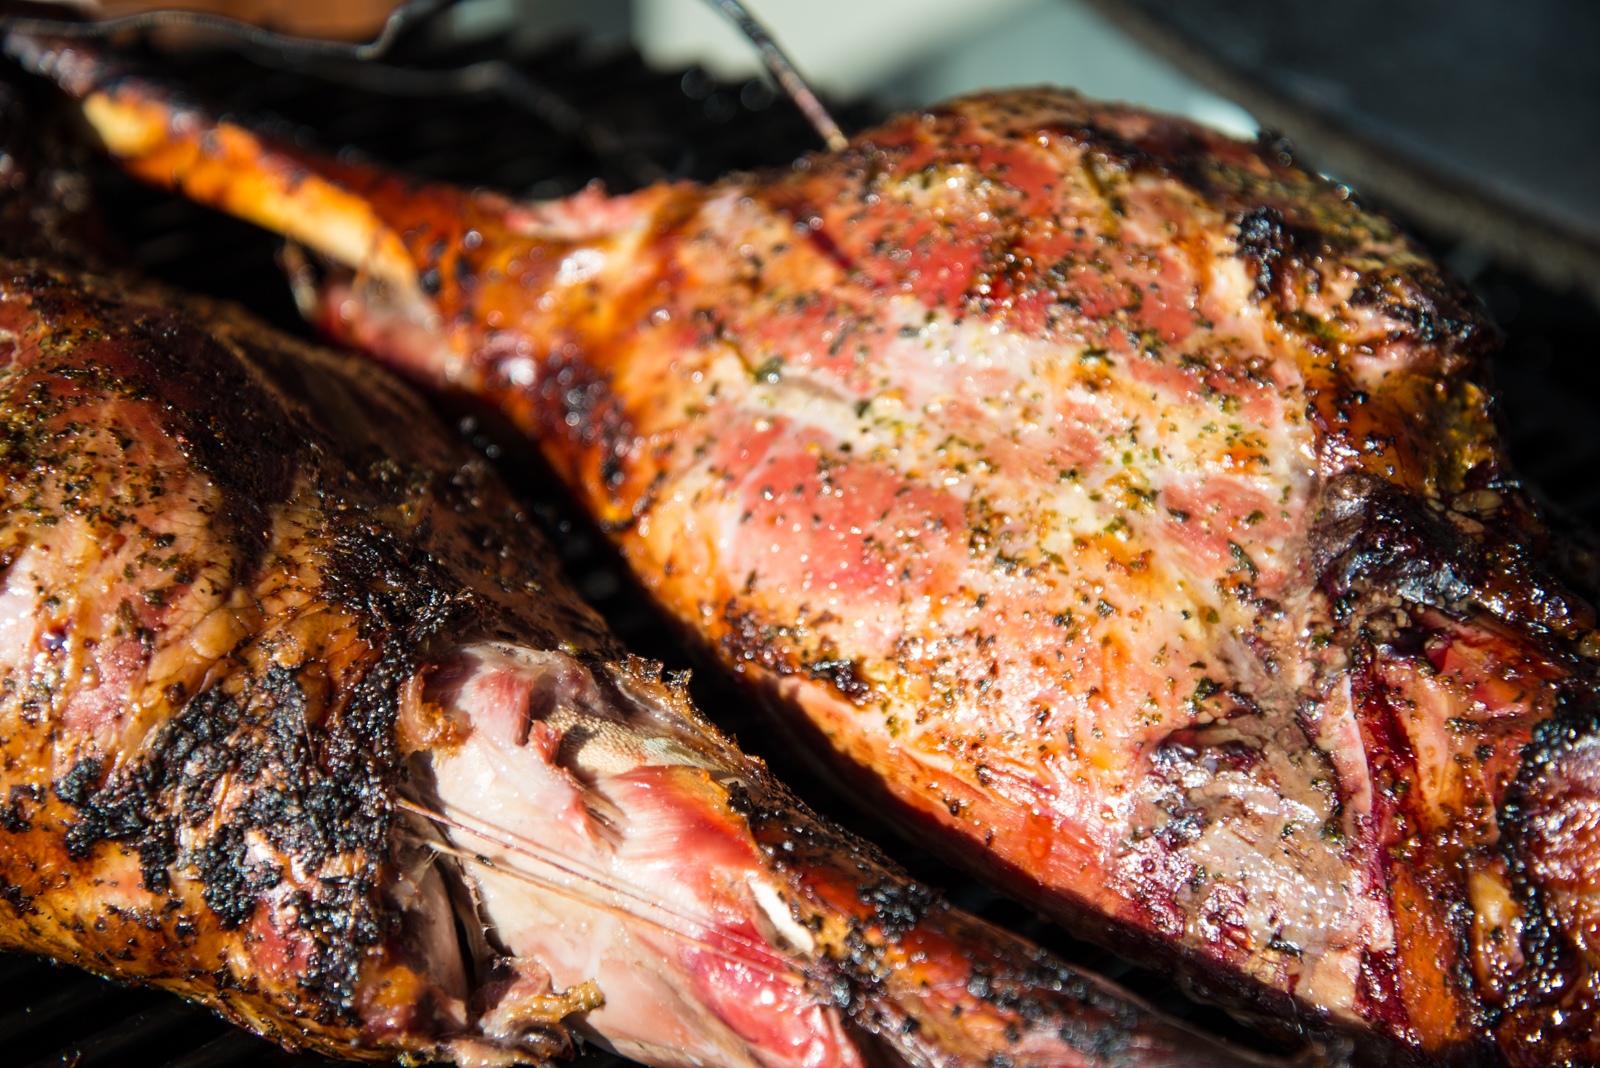
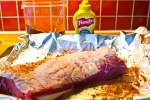
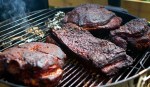
    Two butts, a ham and a cow chest

    should be easily pullable by hand. Here’s a neat tip, get some thin carpenter’s gloves from your local hardware store, and buy some vinyl gloves one size up at the supermarket. Put the builder’s gloves on first and then the vinyl gloves (duh!), and you will be able to pull two pork butts without burning off your fingers (I’ve tried, not fun). If it’s not easy to pull by hand, you took it off the grill prematurely. Don’t worry, use a knife to assist you, it should still taste great. If it does not taste great, you have failed, and consequently brought shame upon your house and family.

  • Once all the pork is pulled, drench it in the North Carolina style vinegar sauce, and serve. Enjoy the taste of a fantastic dish, knowing it tastes even better for you, because you’ve been outside working the BBQ all day. NICE!

BBQ Gallery – II

Last week’s escapades in grilling and BBQ here at BBQ Viking’s house

BBQ Viking Sliders with caramelized onions

Sliders, homemade chipotle mayo, shakey taters and caramelized onions

These sliders are tasty, juicy (even when you have to cook them through), and are real popular with the kids. They’re easy to make too, and require only a quick sear on the grill. You could always buy some slider buns, but I really suggets making your own, see my recipe for buns here. I realize some of you are going to find it extremely controversial that I put bread in my sliders. Don’t knock it till you’ve tried it. I mean it. If you grind your own beef, and have a hot enough grill to get a sear on these while they’re still pink in the middle, you can skip the bread. But I often have to use storebought ground beef, and that means it has to be cooked all the way through. That’s where the bread comes in, by soaking up the juices and fat, it makes these sliders a real, juicy treat.

Time: 60 minutes total
Skill level: Easy
Grilling method: Direct
Grill temperature: About 250 degrees centigrade  (480F)
Equipment: Hickory wood chips for smoke

Serve with:
Homemade chipotle mayo
Homemade slider buns
Shakey potatoes (recipe to come)

Sliders and Texas style BBQ sauce

You’ll need to get hold of:
Ground beef, about 500 grams makes about 15 sliders
2 slices of bread
4 tbsp of your favorite, preferrable homemade, BBQ sauce. I used Rocket Fuelled Bull BBQ Sauce
Some meltable cheese (I prefer orange cheddar)
2 large yellow onions
2 tbsp butter

How you do it:

  • Have a hot grill waiting, for this I just cover the whole grill grate in white hot coals
  • Slice your onions the way you want them, and caramelize them in a frying pan with the butter, some salt and pepper, and about a tbsp of sugar, on low heat for 30-45 minutes. You can do this the night before, store in the fridge and just reheat.
  • Cut away the crust from your two slices of bread, and let it soak in cold water for ten minutes. After soaking, squeeze all the water out of it
  • Mix the ground beef carefully with the BBQ sauce, the bread and liberal amounts of salt and pepper
  • Form the slider patties. Remember to make them flatter and larger-diameter than you want to be finished product to be, because they will change size when they’re being grilled. Each patty should be about 33 grams
  • Get a good hickory smoke going on the grill before starting grilling, I use water-soaked chips for this to maximize smoke, since they’re only on there a couple of minutes.
  • Put them on the grill. About 2-3 minutes should be enough, flip them, put the cheese on the finished side, and give them another 2-3 minutes. Serve!

BBQ Gallery – I

Just some pictures from today’s BBQ-related cooking here at BBQviking’s house…

Which smoke wood to use when?

I get a lot of questions on which smoke wood to use for which foods. Here are some suggestions. Like anything else to do with BBQ, this is no exact science. And remember, what kind of rub or sauce you use and the spice level should also be part of the consideration.

Pork – Pork works well with lots of different smoke woods. I like to use almost anything for pork. I use mesquite a lot for pork, and I use apple (real good for ribs), cherry and pecan wood. Sometimes when I really want smoke taste on pork butts, I use hickory as well. Want something light? Try Alder.

Beef – Beef=hickory in my mind. Sometimes I’ll mix 50/50 hickory and mesquite. Oak is also good, the Jack Daniel’s oak wood chips are great for steaks for instance.

Poultry – For poultry I would normally pick something lighter, like cherry or apple. Sometimes I use mesquite, it can be real tasty with duck, which has a stronger, more gamey taste than chickens

Fish – Oak or alder is very popular for smoking fish. Here in Norway the juniper bush is sometimes used, but I find the taste too owerpowering.

Vegetables – Since they’re not the stars of the show, my vegetables usually get smoked with whatever I’m using for the meat. Hickory and mesquite is great for baked potatoes and ears of corn (prick the potatoes with a fork first).

Lastly, experiment. A lot. It’s the only way to learn what’s best for your tastes. There’s also other ways to make smoke, rosemary smoke from fresh rosemary for lamb for instance. Vines of various kinds can also be used. But don’t use fresh wood, it needs to be dried. Nothing green should go on the grill as smoke wood.