
Smoked bratwurst is great “waiting food” if you’ve got some spare room and you’re doing a long cook.
So you’ve been grilling a little, and want to try your hand at low & slow style BBQ. This is the definitive place to start!
For a lot of people firing up the grill means hot dogs. Which is great. What is not so great, is that it all too often also means bland, cheap, mystery meat pre-boiled sausages with about 20+ ingredients in them. A good sausage should have three basic ingredients: Meat, fat, and spices (and a casing of course). No preservatives, potato flour or corn starch. No secret chemicals. And once you’ve tasted slow-smoked sausages that were uncooked when you started, you’re never going back to pre-boiled ones. Would you buy pre-boiled ribs? Pre-boiled pork butt? If you would, please step away from my blog. So, either make yourself some sausages, or head down to your local butcher or quality food store and get you some of the real stuff. They’re much more filling too, so instead of eating five, you might eat two. In this recipe I like to use raw bratwurst from my local sausagemaker / butcher shop here in Oslo, Strøm-Larsen. One of few places in Oslo that sell uncooked sausage.
Serving suggestion:
I serve these sausages with homemade hamburger buns, a creamy coleslaw, some pickled gherkins, some homemade ketchup, some quality mustard and sometimes also a little red onion compote.
Total time: 90 minutes
Skill level: Beginner/Intermediate
Grilling method: Indirect, one-zone
Grill temperature: About 110-120 degrees centigrade (230-250F)
You’re going to need:
- Quality uncooked bratwurst, chorizo or other uncooked sausages.
- Some form of bun or bread
- Condiments as mentioned above
- Some lump charcoal or charcoal briquettes (make sure you get good ones with no chemicals and food starch as a binder)
- 1 cup of wood smoking chips (I like to mix hickory and some apple or cherry for sausages, read more about smoke wood here.)
- An instant-read thermometer like a Thermapen, or a leave-in probe style thermometer
How you do it:
- Fire up your chimney starter with 20 briquettes or lumps of charcoal (this is based

The setup for smoked brats. A great place to start when you’re getting into BBQ style grilling.
on my 22.5″ Weber kettle, and your mileage and/or method may vary on other grills and smokers)
- In the meantime, put a briquette basket on one side of the grill only, and a big water pan covering the whole middle part of the grill. Why water you say? The mass of water (I use a stainless steel pan from Ikea that holds about 4-5 liters or one US gallon) helps me maintain a steady temperature inside the kettle, because water stores (in this case) heat pretty well. It also helps the meat retain its moisture during the long cook by increasing the general moisture in the cooking environment.
- When your briquettes are white hot, put them in the briquette basket you put on the one side of the grill.
- Put two smokebombs (a handful of soaked wood chips wrapped in aluminium foil) on the briquettes. Putting them out towards the edge of the fire makes them last longer. Wait 5-10 minutes until they start smoking. Replace these as often as you please once they are smoked out. This is especially important the first 4 hours, after that the meat won’t really soak up the smoky flavours anymore.
- Put the grate on, sausages away from the fire on the opposite side, put the lid on
- Refill with wood chips when it stops smoking
-

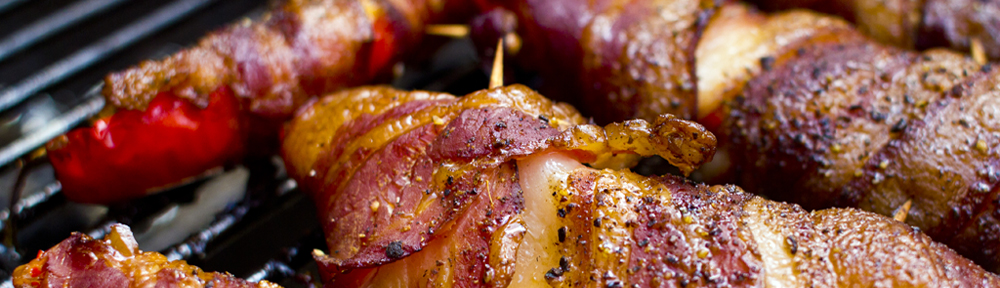
The brats are ready to. Look at the fantastic coloration from the smoke. Oh man!
After about 60-90 minutes sausages should be ready. If one of them bursts, you’re running too hot. Don’t do that. Use your thermapen to check the temperature, uncooked sausage HAS TO be cooked all the way through, ground meat is something you don’t serve rare. I usually take them off the grill when they’re at 85C/185F
- Enjoy!


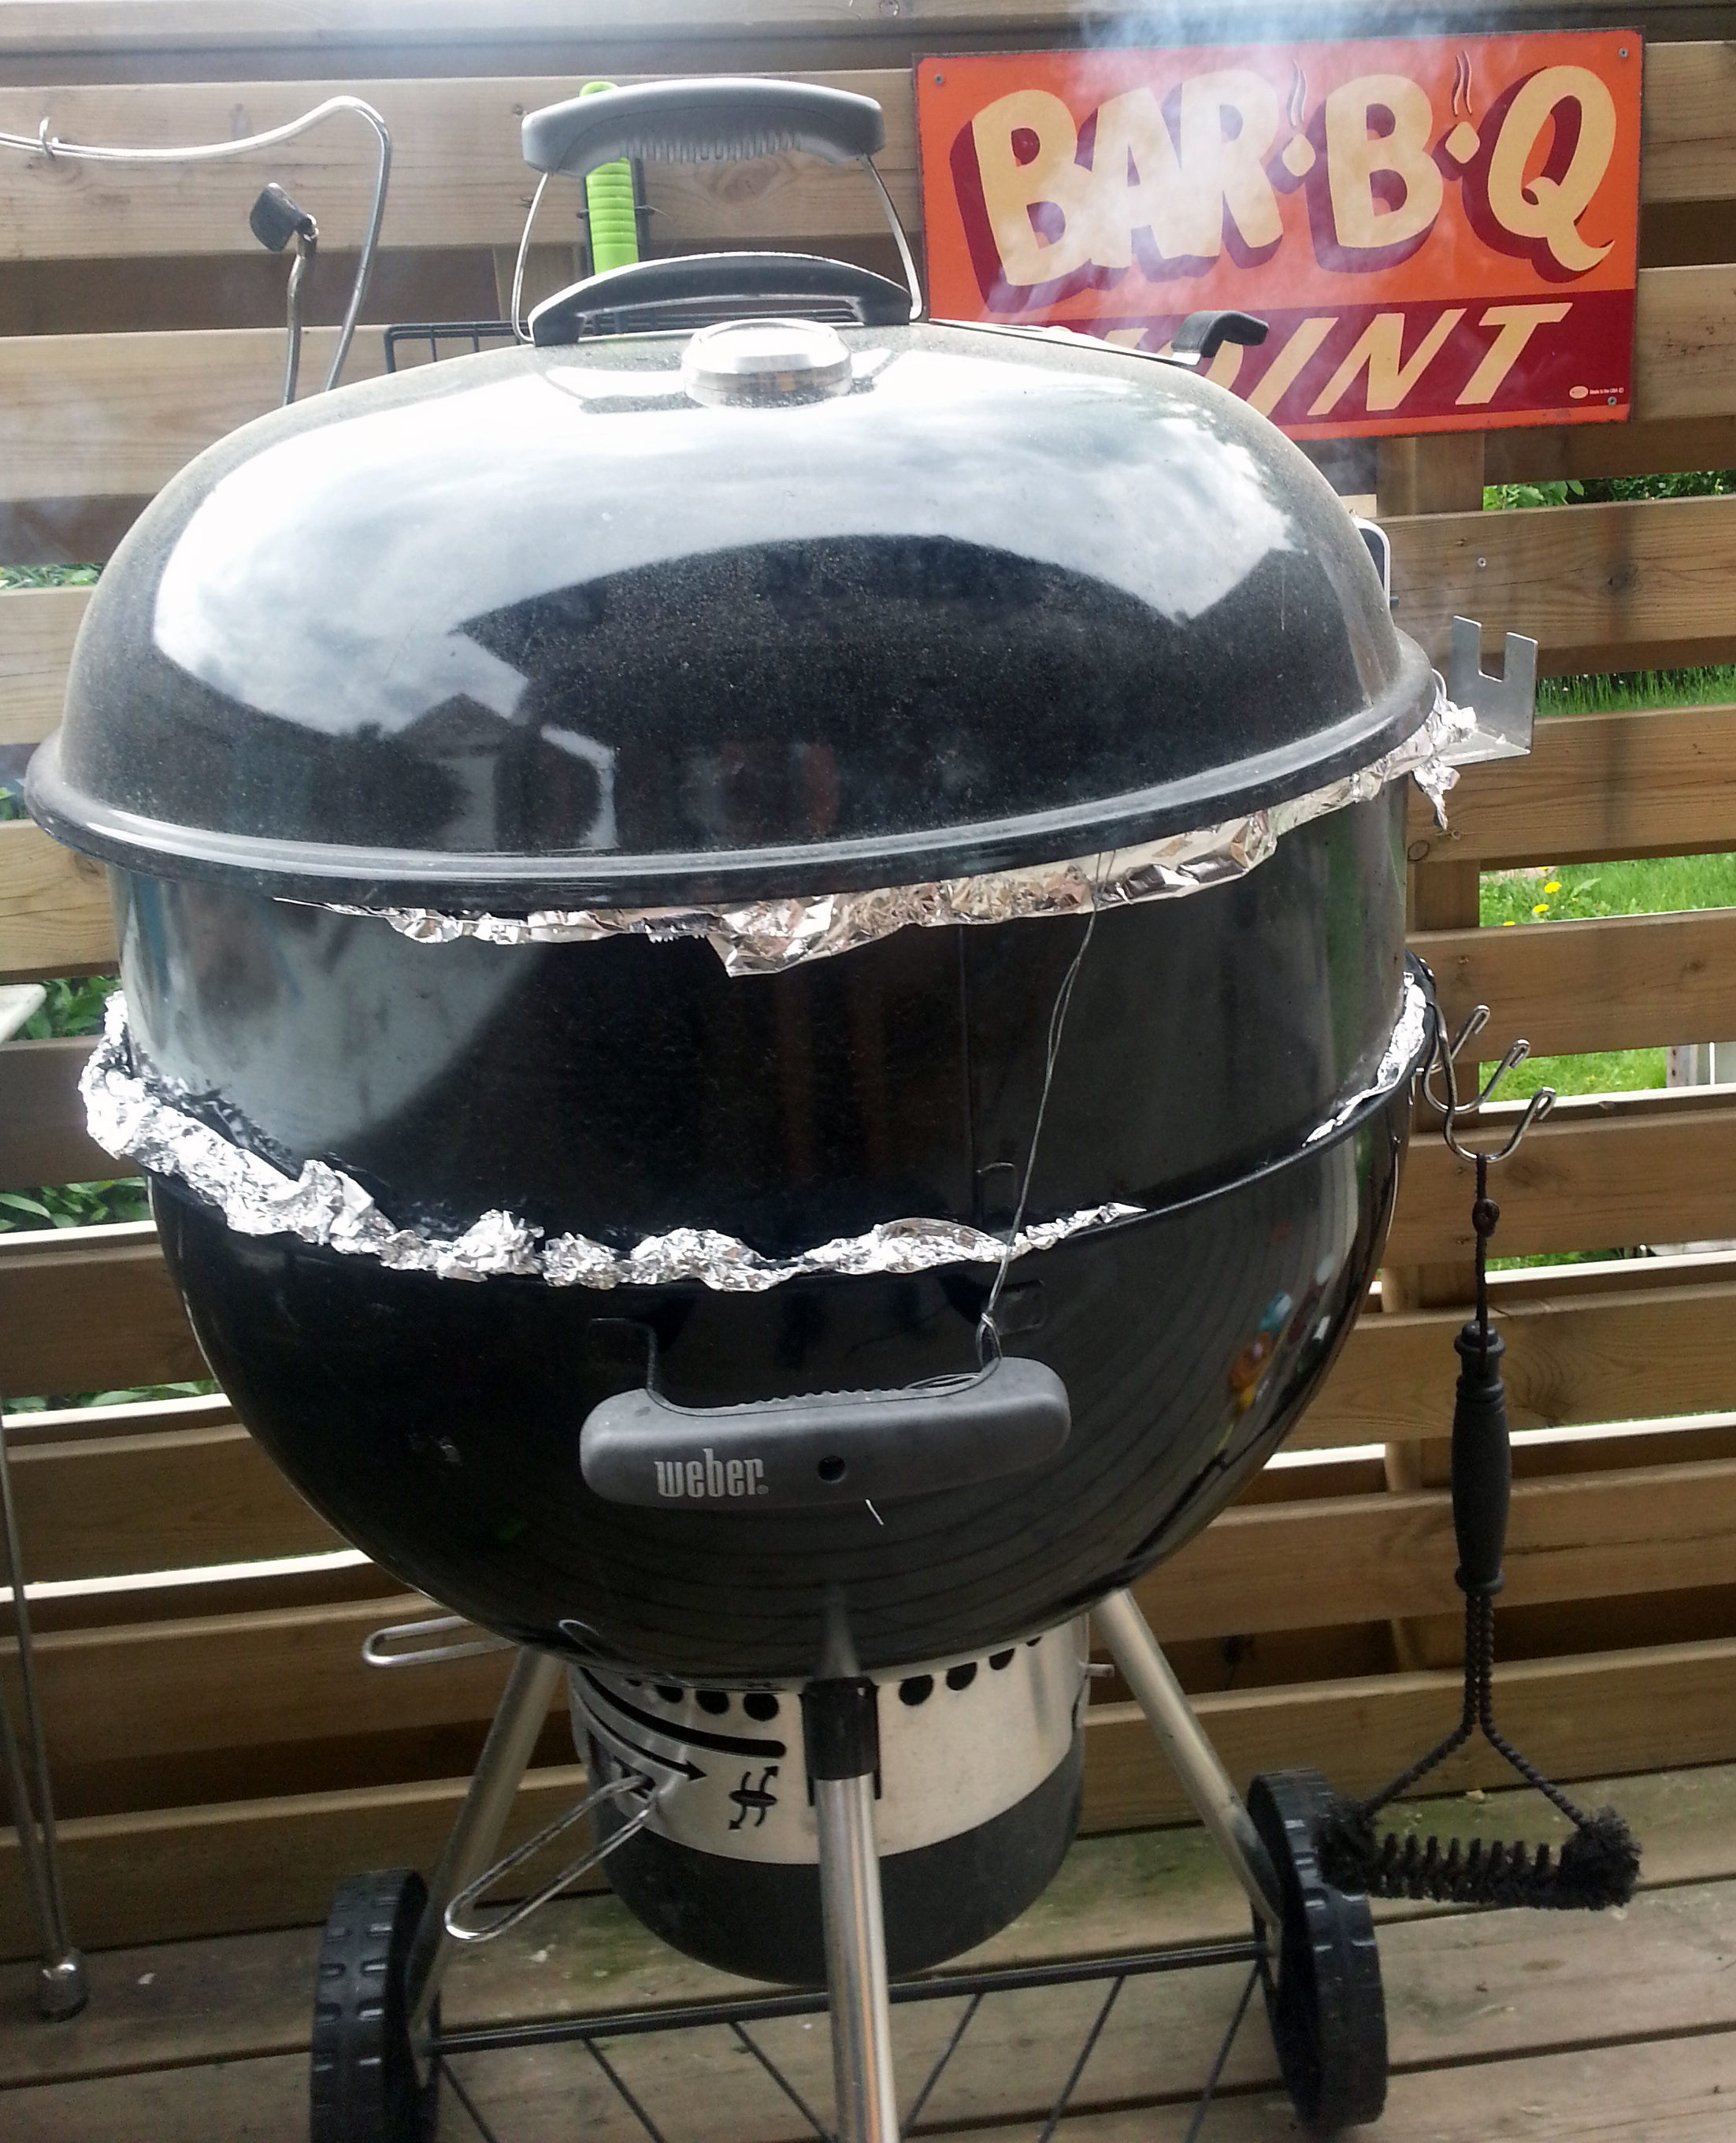
 This worked great, the rig helg up for the 12+ hours I needed for the cook, so all is well. The moral of the story is: Keep some stuff floating around your yard/house/apartment. It could come in handy someday. Also; keep extra rolls of tinfoil. Everywhere.