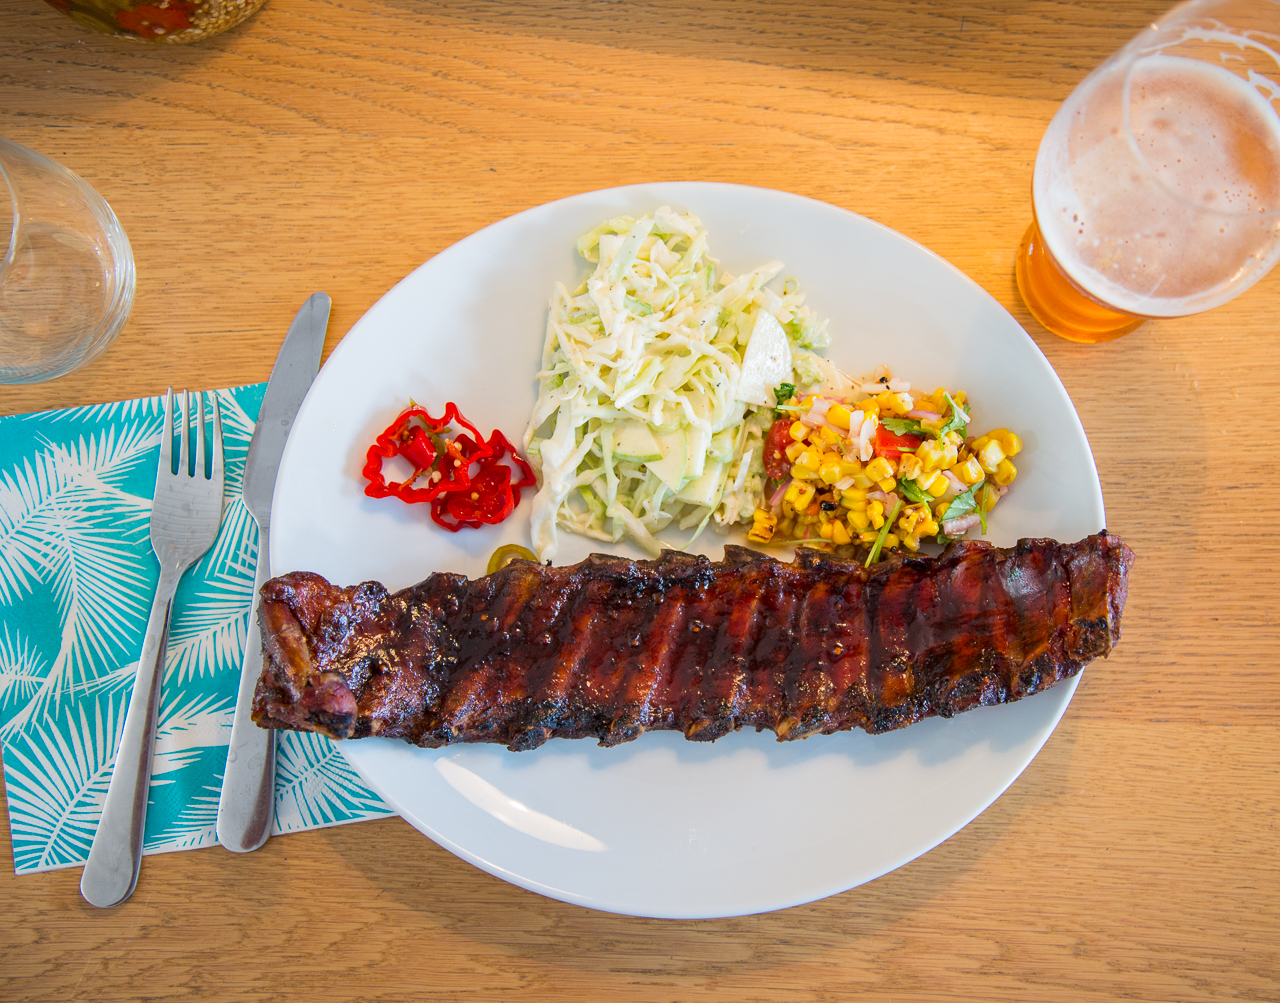
Grilled corn salsa

Grilled sides are of course,Grilled corn salsa ready to go you guessed it, better than un-grilled sides. And it’s corn season here in Norway now. It lasts only for a very short time here, about a month, which of course means: eat as much corn as you can, now! This grilled corn salsa is perfect with steak, burgers, ribs,  fish, venison – it goes well with all grilled proteins really. It takes a little time to make, but I promise you, it will be worth it.

Time: 60 minutes
Skill Level: Easy


What you will need:

  • 5 pieces of corn, on the cob, with the husks
  • 20 cherry tomatoes
  • 1 red onion
  • 1 cup of coarsely chopped cilantro
  • 2 tbsp homemade mustard (or you can buy one)
  • 2 tbsp olive oil
  • 5 tbsp apple cider vinegar
  • Juice from 1 lime
  • 1 tbsp honey
  • Salt & Pepper
  • 2 tbsp butter

The only way to grill cornHow to do it:

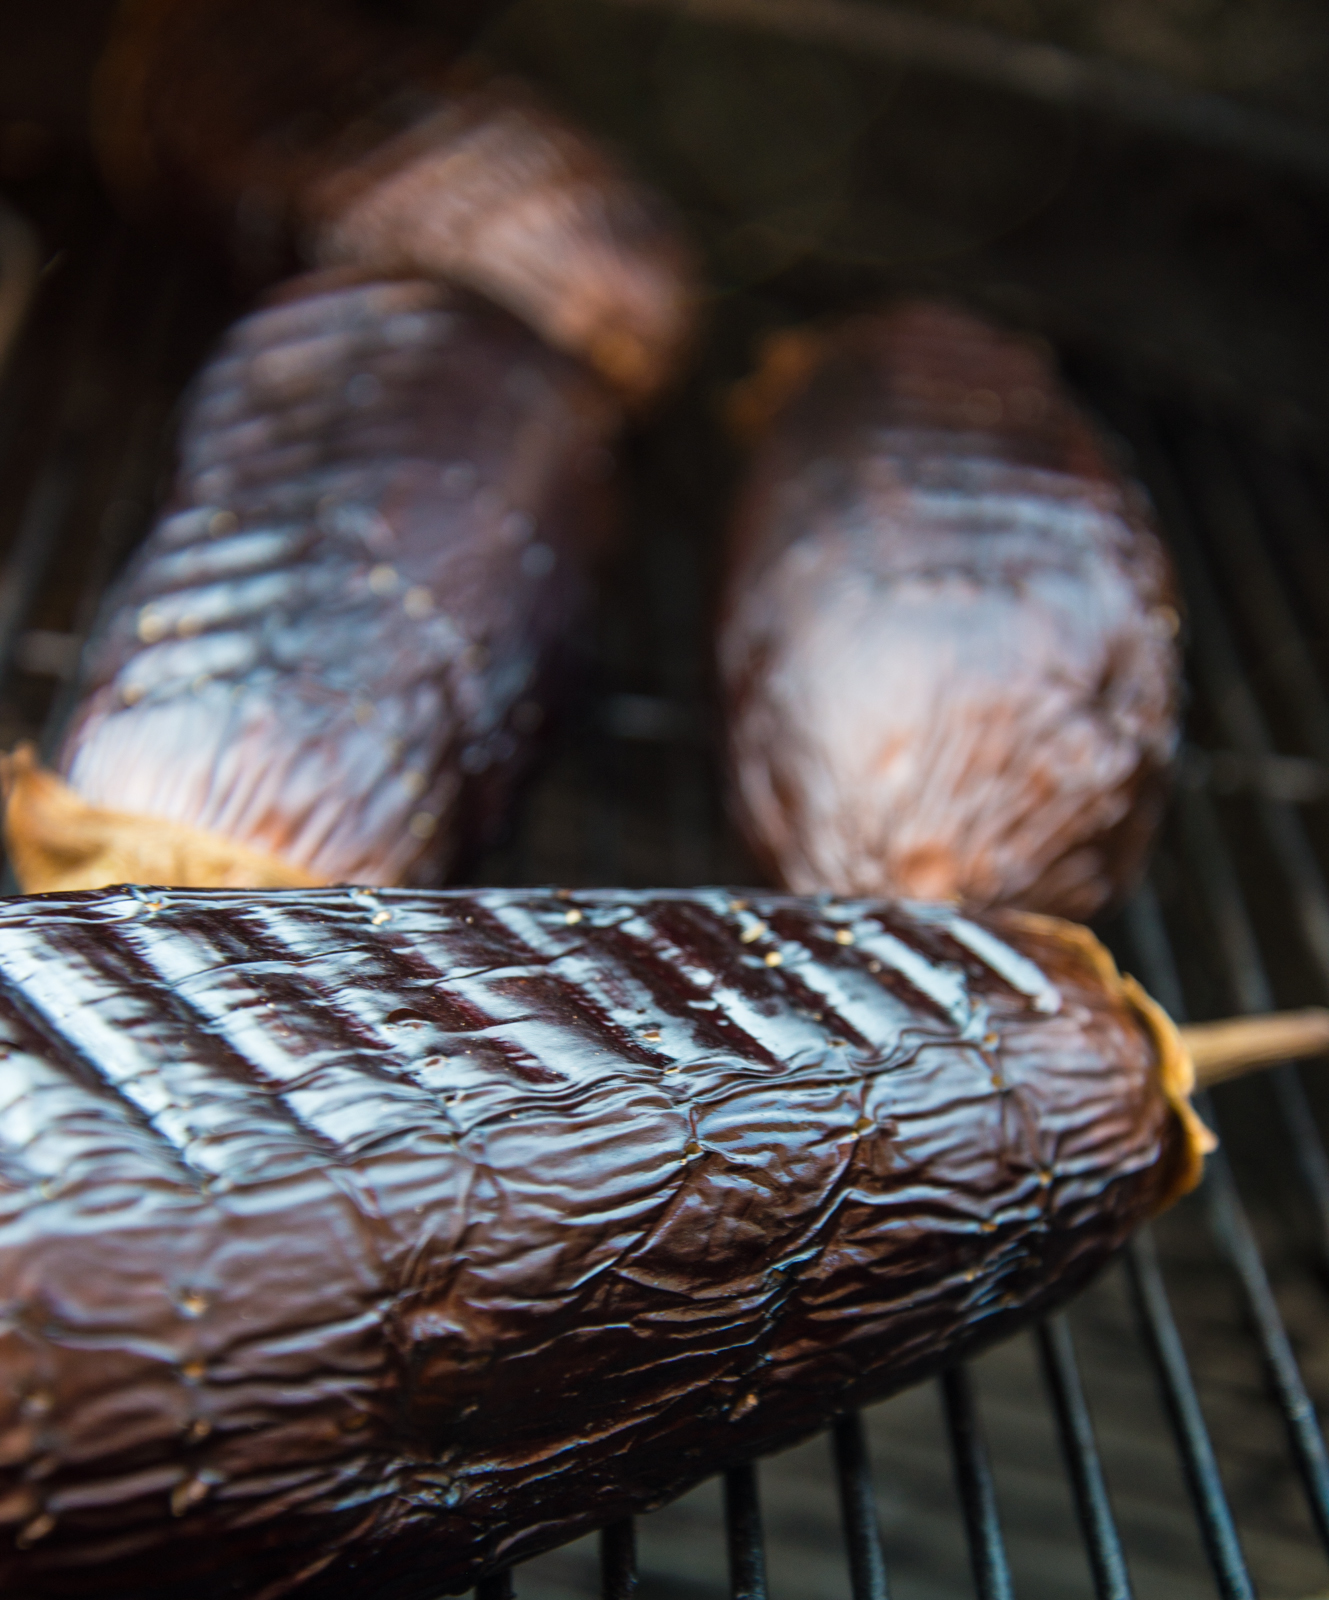
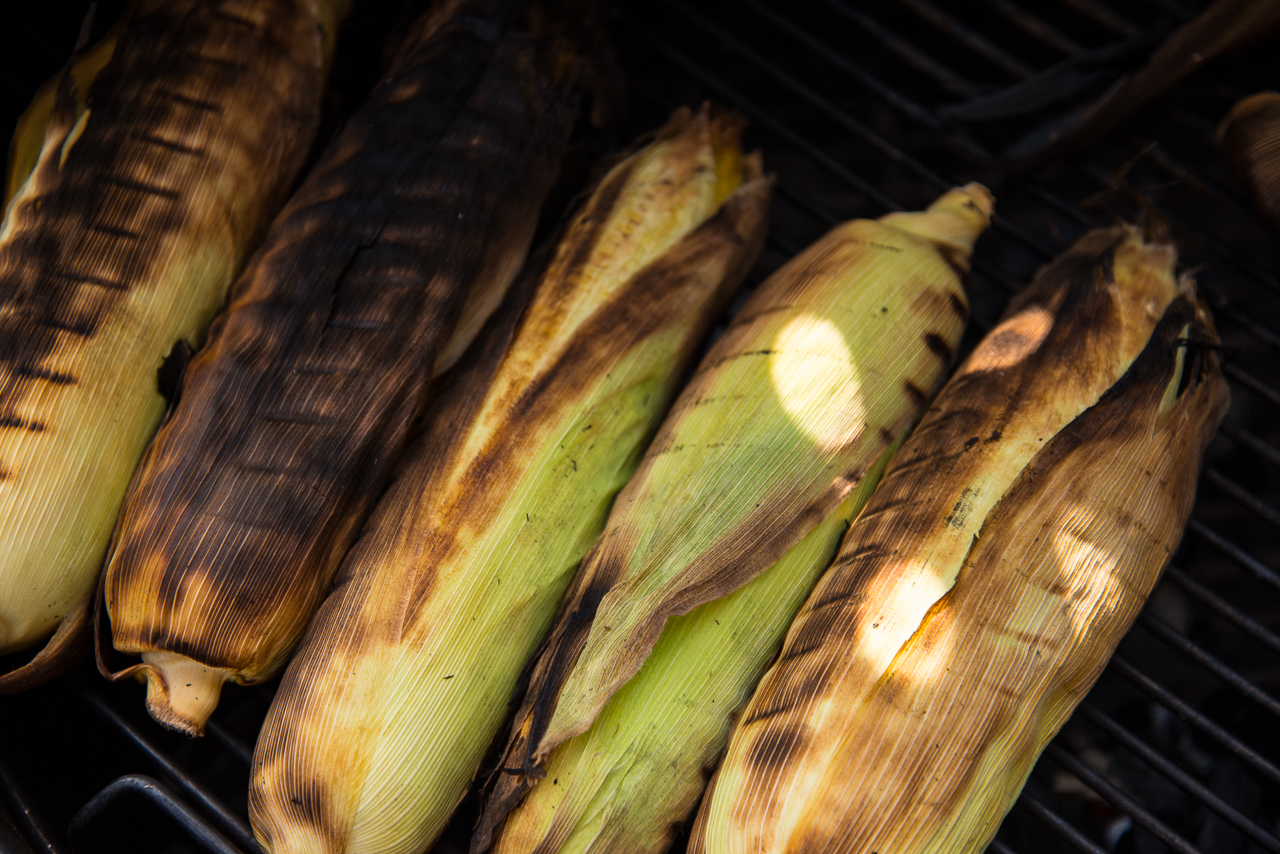
Fire up your grill according to the 50/50 setup. Place the corn cobs, husks on, directly over the fire. Turn them about every 4-5 minutes. While they’re grilling, get a large bowl, and pour in olive oil, mustard, vinegar, lime juice and honey. Whisk it well together to a dressing, and season well with salt & pepper. Coarsely chop cherry tomatoes and red onion, and mix that with the dressing.

Now you can focus on the corn. Once the husks are nicely charred on all sides, take the Peel back the husks and sear it!corn off the grill, and remove the husks. You might need to let it cool a bit depending on your “chef hands” level.. Once the husks are removed, brush lightly with vegetable oil, and lightly sear (not char) the corn directly over the coals. This should be very quick, so keep turning them all the time, or you will end up having burnt corn.

The corn is now almost ready! Time to get it off the cob. I like to do this in some kind of deep dish, but if you want corn all over your kitchen, you can do it on a cutting board. Set the cobs upright and use a knife to remove the corn from the cob. Once it’s all removed, mix it with 1-2 tbsp of Maldon salt, and the 2 tbsp butter. Grind some pepper over it too. Then, put it in the large bowl with the rest of the stuff, add the chopped cilantro, and mix it up. I like to serve this salsa lukewarm like it should be now, but it also keeps well in the fridge. Enjoy!

Baby back ribs, green apple slaw and grilled corn salsa. Nuff said. EAT!

Advertisement

Grillet maissalsa

Grilled corn salsa ready to goGrillet tilbehør er selvsagt bedre enn ikke grillet tilbehør. Og nå er det maissesong i Norge! Butikkene bugner over av deilig fersk mais, noe de ikke gjør de 11 andre månedene i året. Så her er det bare en ting å gjøre: spis så mye mais som mulig, nå. Denne maissalsaen passer perfekt til biff, grillet fisk, baby back ribs, ja til bortimot alle proteiner du måtte finne på å slenge på grillen. Den tar litt tid å lage, men du kommer garantert til å synes at det var verdt det.

Tid: 60 minutter
Vanskelighetsgrad: Enkel


Hva du trenger:

  • 5 maiskolber, med bladene på
  • 20 cherrytomater
  • 1 rødløk
  • 1 kopp med grovhakket koriander
  • 2 ss med hjemmelaget IPA-sennep (eller du kan kjøpe en god sennep)
  • 2 ss olivenolje
  • 5 ss eplesideredikk
  • Juice fra 1 lime
  • 1 ss honning
  • Salt & pepper
  • 2 ss smør

The only way to grill cornFremgangsmåte:

Fyr opp grillen din med såkalt 50/50 oppsett, dvs. kull på ene halvdelen. Plasser maiskolbene med bladene på direkte over kullet. De må snus ca. hvert 4.-5. minutt. Mens maiskolbene grilles, finn en stor bolle og hell oppi sennep, olivenolje, eplesideredikk, limejuice og honning. Visp dette sammen til en dressing og krydre den med salt og pepper. Grovhakk cherrytomater og rødløk, og bland det med dressingen. Vent med koriander til servering, den smaker best da.

Nå kan du fokusere på maisen. Når bladene er godt svidd på alle sider, tar du maisen avPeel back the husks and sear it! grillen, og fjerner alle bladene. Du må kanskje la maisen kjøle seg litt før du gjør dette, alt etter hvor mye kokkehender du har. Når bladene er fjernet, pensler du maiskolbene med litt vegetabilsk olje, før du bruner dem direkte over kullet. Dette går veldig fort, så her må du bare snu, snu og snu, hele tiden, hvis ikke ender du opp med brent mais.

Nå er maisen nesten klar! Neste steg er å finne en dyp form eller lignende, sette maiskolbene på høykant, og skjære maiskornene av kolben. Når alt er av, blander du inn 1-2 ss Maldon-salt, og 2 ss smør. Kvern litt svart pepper over maisen også, før du putter den i bollen med resten av salsaen, sammen med den grovhakkede korianderen, og bland alt godt. Jeg liker å servere den lunken med en gang, men den holder seg også godt i kjøleskapet noen timer.

Baby back ribs, green apple slaw and grilled corn salsa. Nuff said. EAT!

BBQ 101 – Smoked leg of lamb

DSC_1977Lamb season is fast approaching here in Norway, and bone-in leg of lamb is my favorite. I know boneless is just as good, and butterflied is much quicker, but nothing beats the visual impact of a big chunk of meat with the bone still in it for me. Maybe it’s my Nordic genes, or maybe it’s the caveman or woman in all of us wanting some satisfaction? Anyhow, I will use bone-in for this recipe, it’s just more fun that way, plus the bone-in version has to great other features: Firstly, a nice handle for turning the meat in the form of a bone, secondly a litttle chef’s snack muscle towards to thin end of the bone. So there, bone-in wins for me, every time. Note: I have to excuse the lack of a photo of the plated food in this post, but sometimes the food is so good and I am so hungry that I forget. So enjoy a ton of pics of the lamb on the grill instead…. 😀

Serving suggestion:
I like to serve leg of lamb spiced in the mediterranean way, with an aubergine purée, some red onion compote and some freshly grilled greens. You can make a sauce too from the drippings.

2014-03-28 19.53.49-1Total time: 5-8 hours, marinating the day before if you want to
Skill level: Beginner/Intermediate
Grilling method: Indirect, one-zone
Grill temperature: About 110-120 degrees centigrade (230-250F), or even lowe if you can manage

You’re going to need:

  • A leg of lamb per four people should be about right, depending on how big they are
  • Rosemary, lots of rosemary
  • Garlic, lots of garlic
  • A lemon
  • Honey
  • Mustard, a homemade one is of course best
  • Good olive oil
  • Cayenne pepper

How you do it the day before:

  • If you want to marinate the meat, you should start the day before. Mix up lemon, rosemary, honey, lots of crushed garlic, some mustard and a good olive oil in a blender. Add salt and pepper to taste, and some cayenne pepper if you want some heat (I always do)
  • If you’re lucky enough to have one of those fancy vacuum machines like I do, throw the leg in a bag with the marinade and vacuum it up, leaving it in the fridge overnight. If not, use a plastic bag, and try to cover it well in the marinade before wrapping it up and putting in the fridge.

DSC_1981How you do it on BBQ day:

  • Fire up your grill, and set it up for
  •  indirect, low and slow cooking with some coals on one side, and place for the met on the other. If you want to make sauce, you’re going to need a drip pan to put under the meat to catch drippings
  • If you didn’t marinate the night before, go up a couple steps, make the marinade mix and get the meat slathered in that stuff before you put the meat on the grill. If you did, take the meat out of the bag, but save up the marinade leftovers for later.
  • Remember to get the smoke going before putting the meat on. I like to mix rosemary branches with hickory for lamb smoking.
  • Add some water to your drip pan. Not a lot, this is just to keep the drippings from burning, remember you will make that into a sauce later.
  • Add a temperature probe to the meatiest part of the leg, and add another one to the grill grate to monitor grill temperature. You don’t have a two-probe style wireless thermometer yet you say? Go and get yourself one. I have been using the Maverick ET-732 for a couple years, and it works quite well.
  • Keep the grill low and slow for hours, keeping an eye on meat and grill temp. Add aRoasted aubergine. Not quite done yet. cup of water to the drip pan if it runs out, and add coals if you need to (I don’t anymore thanks to my lovely new Primo Oval XL)
  • Once the meat reaches an internal temperature of exactly 68C (155F), take it off the grill, wrap it in a double layer of aluminium foil, and wrap that in a plastic bag, then a couple towels. Ideally you want to rest the leg for at least one hour, but if you’re done well ahead of dinner, resting it for 2-3 or even 4 hours is not a problem at all.
  • Take out the drip pan, put the sauce in a pot, and make a delicious sauce. Adding some red wine, salt and pepper to taste and reducing until you have the desired consistency is a good idea. If the sauce is too sharp, some honey might be able to help you out.
  • While you wait for the guest to arrive, you can make the sides, like aubergine purée and some red onion compote
  • When you are about ready to serve, fire the grill up for direct cooking at a temp of about 150-160C (300-320F), brush the leg with any marinade leftovers, and finish the leg off over direct heat. The goal here is to get a nice sear before serving, and crisping up the outside.
  • Let the lamb rest for 5-10 minutes again, while you grill up some fresh spring oninon and/or asparagus. Serve and enjoy!DSC_1988

Make your own craft beer mustard

Soaking mustards seeds in delicious beer!I am big into craft beer these days. I have a particular fondness for American style, hop-crazy IPAs and double IPAs. So I decided to try and make some mustard with an IPA twist to it. If you prefer, you can use other beers as well, I have tried some strong tasting stouts and had success with those too. Mustard is easy and fairly cheap to make, and since the whole process requires no cooking, tasting and adjusting while going along is easy! So why don’t you make your own mustard to go with those delicious smoked brats?


Time: 60 minutes work, 18-24 hours total incl. waiting
Skill Level: Easy

You’re going to need:

  • 200 grams of mustard seeds (a 50/50 mix of brown/yellow works fine)
  • A small bottle (12 fl oz/330ml) good beer, I like to use a hoppy IPA
  • 1-2 tsp sea salt
  • 1-2 teaspoons of chili flakes
  • 6 tablespoons of honey, maple syrup can also work well
  • 0.5 cup of good vinegar (I prefer white wine vinegar for this mustard)

How to do it:

  • The night before making the mustard, put all the mustard seeds and your beer into a DSC_1624bowl, mix well, and leave overnight. This will allow the seeds to soak up all the beer.
  • Once soaked overnight, put the mixture in a food processor. Add remaining ingredients, pulse until you’ve got the consistency you like. If the mustard is too dry for you, add some water if needed
  • Since this is a no cooking process, have a taste, and balance out with honey, vinegar, salt and chili to your tastes
  • If you put this stuff in sterilized jars, it will last you weeks/months. Your mileage may vary here.

Great winter BBQ activity: Cold-smoke some cheese on your kettle!

Ecological Brie, Camembert, some Port Salut, and some mature Cheddar, ready for the smoker.

Ecological Brie, Camembert, some Port Salut, and some mature Cheddar, ready for the smoker.

I’m a big fan of the French kitchen, and I’m also a big fan of go big or go home. And what could be more gluttonous and over the top than going with a nice plate (or cart if you have one) of cheese for dessert after a BBQ feast? You tell me. Anyhow, it’s cold here now, freezing every single day, so it’s real easy to keep the kettle low in temperatures. This makes the weather perfect for smoking some cheese, because you really don’t want it to melt all up in your kettle now, do you? This was my first go at smoking cheese, so I bought some different ones they had at the local supermarket, just to do a test. In the pic above you can see the candidates, and since most of you don’t know Norwegian, I will explain. There are two soft cheeses, both Norwegian, ecological versions of French staples Brie and Camembert. Then there’s a Norwegian version of Port Salut, and a good Mature Cheddar from England. A hot tip btw is taking a picture like this of your arrangement, so you know which cheese is which when they come back in the kitchen. Take note that the cheese will taste best if you do the smoking some time before eating. I did it the day before, and they came out great. We found the hard cheeses came out best, which makes sense since the soft ones have this protective layer on the outside. Maybe next time I’ll try slicing the soft ones lengthwise into two circular “bowls” and see if that makes them smokier. A lot of people recommend Pepper Jack and Monterey Jack cheeses, so if you can find those where you’re at – I’d go for those! Gouda should also be a good alternative.

This is what they looked like after 2 hours of cold-smoking using hickory chips

This is what they looked like after 2 hours of cold-smoking using hickory chips

What you need:

  • Cheese for smoking
  • Some lump charcoal, or briquettes
  • Smoking wood chips (I used Hickory, but Pecan or others should be great for this too)
  • Honey, maple syrup, dried fruit and some crackers could be useful for serving. For drinks I’d go with some strong, sweet Trappist style craft beer (Chimay, Rochefort), or some dessert wine.

Preparations:

  • Make a very small fire on your kettle all the way off to one side. Make it as small as possible, just enough to keep the chips smoking. As the goal here is cold-smoking, this would best be done in winter, and if the sun is shining, keep the kettle in the shade!

The setup for cold-smoking cheese

How to do it:

  • Unwrap cheese
  • Place on cold side of smoker on a clean rack
  • Make sure you keep the smoke going all the time. I smoked the cheese for about 2 hours, and it seemed about right
  • I mellowed the cheese in the fridge overnight, wrapped in plastic. Some people claim the smoke flavour will spread better through the cheese after a couple of days or even a week. Didn’t have time to test this claim yet, but if you do, let me know what you think!
  • Remember to take your cheeses out of the fridge a couple of hours before eating, fridge-cold cheese is not awesome.
  • Enjoy!

Deliciousness!