Grilled corn salsa

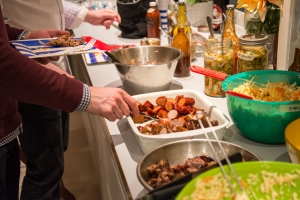
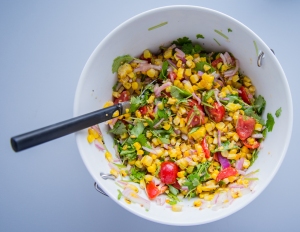
Grilled sides are of course,Grilled corn salsa ready to go you guessed it, better than un-grilled sides. And it’s corn season here in Norway now. It lasts only for a very short time here, about a month, which of course means: eat as much corn as you can, now! This grilled corn salsa is perfect with steak, burgers, ribs,  fish, venison – it goes well with all grilled proteins really. It takes a little time to make, but I promise you, it will be worth it.
Time: 60 minutes
Skill Level: Easy


What you will need:

  • 5 pieces of corn, on the cob, with the husks
  • 20 cherry tomatoes
  • 1 red onion
  • 1 cup of coarsely chopped cilantro
  • 2 tbsp homemade mustard (or you can buy one)
  • 2 tbsp olive oil
  • 5 tbsp apple cider vinegar
  • Juice from 1 lime
  • 1 tbsp honey
  • Salt & Pepper
  • 2 tbsp butter

The only way to grill cornHow to do it:

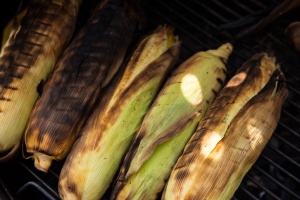
Fire up your grill according to the 50/50 setup. Place the corn cobs, husks on, directly over the fire. Turn them about every 4-5 minutes. While they’re grilling, get a large bowl, and pour in olive oil, mustard, vinegar, lime juice and honey. Whisk it well together to a dressing, and season well with salt & pepper. Coarsely chop cherry tomatoes and red onion, and mix that with the dressing.

Now you can focus on the corn. Once the husks are nicely charred on all sides, take the Peel back the husks and sear it!corn off the grill, and remove the husks. You might need to let it cool a bit depending on your “chef hands” level.. Once the husks are removed, brush lightly with vegetable oil, and lightly sear (not char) the corn directly over the coals. This should be very quick, so keep turning them all the time, or you will end up having burnt corn.
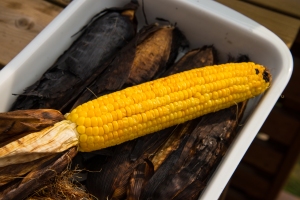
The corn is now almost ready! Time to get it off the cob. I like to do this in some kind of deep dish, but if you want corn all over your kitchen, you can do it on a cutting board. Set the cobs upright and use a knife to remove the corn from the cob. Once it’s all removed, mix it with 1-2 tbsp of Maldon salt, and the 2 tbsp butter. Grind some pepper over it too. Then, put it in the large bowl with the rest of the stuff, add the chopped cilantro, and mix it up. I like to serve this salsa lukewarm like it should be now, but it also keeps well in the fridge. Enjoy!

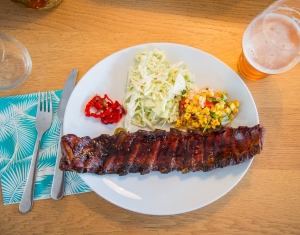
Baby back ribs, green apple slaw and grilled corn salsa. Nuff said. EAT!

Creamy green apple slaw

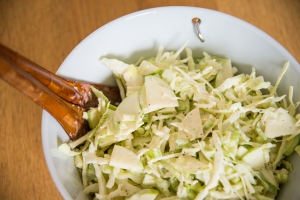
Creamy green apple slawThis slaw is perfect for baby back ribs, pulled pork, smoked bratwurst and other pork dishes (it is perfect with some pork chops!). The Granny Smith apples make it fresh and crisp, perfect for a warm summer day (just don’t leave it out of the fridge too long).

Time: 15 minutes
Skill Level: Easy


What you will need:

  • 1/3 a head of cabbage
  • 2 large Granny Smith apples
  • 2 celery stalks
  • 1/3 cup of heavy cream
  • 1/3 cup of apple cider vinegar
  • 2 tbsp dijon mustard
  • 1 tsp celery seed
  • 1 tsp cayenne pepper
  • 2 tbsp powdered (or regular) sugar
  • Salt & pepper


How to do it:

Find yourself a large salad bowl, and pour in the cream, vinegar, mustard, celery seed, Creamy green apple slawcayenne, sugar and some salt & pepper. Whisk it all together. If you’re using regular sugar, make sure you whisk until it is all dissolved. Chop your cabbage in thin slices, the apples can be sliced or diced depending on how much texture you want from them. Finely chop the celery stalks. Toss it properly, and ideally leave to sit in the fridge for a couple hours before serving, this really lets the flavors develop. Mix well. Enjoy!

Spicy coleslaw with vinegar dressing

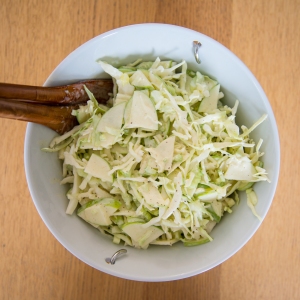
Spicy slaw and other sides are vital to a perfect BBQ party!A lot of people like the creamy coleslaw I have posted about earlier on this site. I think it’s perfect on buns for burgers and pulled pork. But as a side to steak, pork chops, bratwurst and more – I personally prefer a vinegar based coleslaw. Another plus of course is that a vinegar based coleslaw is super healthy and almost free of calories, which means I can eat even more smoked meat. So, how about this for a spicy, vinegary slaw for your next BBQ?

Time: 15 minutes
Skill Level: Easy


What you will need:

  • 1/2 a head of cabbage
  • 3 carrots
  • 1-6 finely chopped fresh chilies (depending on the level of fire you want)
  • 1 tsp maldon salt
  • 1 tsp celery seed
  • 1 tsp freshly ground black pepper
  • 1/2 cup of cider vinegar
  • 2 tbsp olive oil
  • 2 tbsp dijon mustard
  • Some hot sauce


How to do it:

Find yourself a large salad bowl, and chuck in the salt, celery seed, pepper, vinegar, olive oil, mustard, and a couple tsp of your favorite hot sauce. Whisk it all together into a lovely dressing, adding more salt/pepper/hot sauce to taste. Chop your cabbage, carrots and chilies the way you like them (I’m lazy, so I grate it all in my food processor…), and throw it in there. Mix well. I think this slaw tastes best if I make it in the morning and let it sit in the fridge until dinner time. Enjoy!

Heit coleslaw med chili og edikkdressing

Spicy slaw and other sides are vital to a perfect BBQ party!Mange liker coleslaw med majones- fløte- eller rømme-basert dressing, som jeg har lagt ut oppskrift på tidligere på denne bloggen. Sånn coleslaw synes jeg er perfekt på burgerbrød eller brød til pulled pork. Men som tilbehør til kylling, en god biff, deilig røkt bratwurst eller en knallgod svinekotelett synes jeg denne edikkbaserte coleslawen med chili er mye mer spennende. Ett annet pluss med denne typen coleslaw er selvsagt at den er nesten blottet for kalorier og sunn som fy. Så da kan man spise enda mer røkt kjøtt, ikke sant? Prøv denne coleslawen neste gang du skal ha grillfest!

Tid: 15 minutter
Vanskelighetsgrad: Enkel

Hva trenger du:

  • 1/2 hodekål
  • 3 gulrøtter
  • 1-6 finhakkede chilie (antall og type er opp til deg, hvor sterkt vil du ha det?)
  • 1 ts maldon-salt
  • 1 ts sellerifrø
  • 1 ts nykvernet sort pepper
  • 1/2 kopp eplesideredikk
  • 2 ss olivenolje
  • 2 ss Dijon-sennep
  • Tabasco eller din favoritt chilisaus

Tilberedning:
Finn deg en stor salatbolle, hiv oppi salt, sellerifrø, pepper, edikk, olivenolje, sennep og noen teskjeer med chilisaus. Visp alt sammen godt til en fin dressing, og smak til med salt/pepper/chilisaus. Hakk opp kål, gulrøtter og chili slik du liker dem (jeg er lat så jeg pleier rive alt i food processor..), og hiv det i bollen. Bland alt sammen godt, og du er klar! Jeg synes denne smaker best om den lages på morgenkvisten eller dagen før den skal spises, så den får stå i kjøleskapet og godgjøre seg en stund.

Smoky aubergine purée

Roasted aubergine. Not quite done yet.Aubergine puréee is an easy side dish to make on the grill. It goes particularly well with lamb, but also works nicely as a side for steak or venison. Here’s how I normally do it.

Time: 60-90 minutes
Skill Level: Easy

What you will need:
4 large aubergines
2 whole garlic
1/2 cup of good olive oil
1 lemon
Salt/pepper

How to do it:

Get your grill ready for indirect cooking at about 175-200C (350-400F)First, prep the aubergines by stabbing them repeteadly with a fork all over. This can be fun, imagine you’re stabbing someone you really don’t like! Or don’t. Once the grill is ready, chuck the aubergines and the whole garlic on the coldest side of the grill, and roast them for about 45-60 minutes. When the aubergines are done they will feel noticeably softer than they were. Get everything off the grill. Peel the aubergines and chop them roughly, put them in a blender. Squeeze the now soft garlic “meat” out of the whole garlic. Mix it all up in a blender, while slowly adding the olive oil. Add juice from the lemon and salt and pepper to taste. Serve!

DSC_1981


Great winter BBQ activity: Cold-smoke some cheese on your kettle!

Ecological Brie, Camembert, some Port Salut, and some mature Cheddar, ready for the smoker.

Ecological Brie, Camembert, some Port Salut, and some mature Cheddar, ready for the smoker.

I’m a big fan of the French kitchen, and I’m also a big fan of go big or go home. And what could be more gluttonous and over the top than going with a nice plate (or cart if you have one) of cheese for dessert after a BBQ feast? You tell me. Anyhow, it’s cold here now, freezing every single day, so it’s real easy to keep the kettle low in temperatures. This makes the weather perfect for smoking some cheese, because you really don’t want it to melt all up in your kettle now, do you? This was my first go at smoking cheese, so I bought some different ones they had at the local supermarket, just to do a test. In the pic above you can see the candidates, and since most of you don’t know Norwegian, I will explain. There are two soft cheeses, both Norwegian, ecological versions of French staples Brie and Camembert. Then there’s a Norwegian version of Port Salut, and a good Mature Cheddar from England. A hot tip btw is taking a picture like this of your arrangement, so you know which cheese is which when they come back in the kitchen. Take note that the cheese will taste best if you do the smoking some time before eating. I did it the day before, and they came out great. We found the hard cheeses came out best, which makes sense since the soft ones have this protective layer on the outside. Maybe next time I’ll try slicing the soft ones lengthwise into two circular “bowls” and see if that makes them smokier. A lot of people recommend Pepper Jack and Monterey Jack cheeses, so if you can find those where you’re at – I’d go for those! Gouda should also be a good alternative.

This is what they looked like after 2 hours of cold-smoking using hickory chips

This is what they looked like after 2 hours of cold-smoking using hickory chips

What you need:

  • Cheese for smoking
  • Some lump charcoal, or briquettes
  • Smoking wood chips (I used Hickory, but Pecan or others should be great for this too)
  • Honey, maple syrup, dried fruit and some crackers could be useful for serving. For drinks I’d go with some strong, sweet Trappist style craft beer (Chimay, Rochefort), or some dessert wine.

Preparations:

  • Make a very small fire on your kettle all the way off to one side. Make it as small as possible, just enough to keep the chips smoking. As the goal here is cold-smoking, this would best be done in winter, and if the sun is shining, keep the kettle in the shade!

The setup for cold-smoking cheese

How to do it:

  • Unwrap cheese
  • Place on cold side of smoker on a clean rack
  • Make sure you keep the smoke going all the time. I smoked the cheese for about 2 hours, and it seemed about right
  • I mellowed the cheese in the fridge overnight, wrapped in plastic. Some people claim the smoke flavour will spread better through the cheese after a couple of days or even a week. Didn’t have time to test this claim yet, but if you do, let me know what you think!
  • Remember to take your cheeses out of the fridge a couple of hours before eating, fridge-cold cheese is not awesome.
  • Enjoy!

Deliciousness!

ABT’s with hot chorizo and vegetable filling

ABT’s are great as an appetizer or side dish if you’re cooking something low & slow and have some extra space on your grill. Why they’re called atomic bomb turds, I do not know. It’s kind of a weird name for a food item, but there ya go. That’s what it means. You can use all kinds of stuff to put into the chillies, but in this recipe I went for a simple filling with some vegetables, cream cheese and hot chorizo sausage. I also used some good pancetta instead of the traditional bacon to wrap them, but you can use either, and it will be fantastically good. The union of hot chillies, bacon and tons of apple smoke is a tasty one indeed. Just make sure you make enough of them, I’d say 3-4 per person as a minimum for a starter.

Prep time: 10-15 minutes
Time on the grill: 90-120 minutes
Grilling method: Indirect, with smoke
Grilling temperature: 130 Centigrade lid temp (266F)

What you need:
5 Largish peppers of your choosing. I found some large chillies at my local market
10 strips of good bacon or pancetta
Some cream cheese, I used Philadelphia with much success
A little bit of hot chorizo sausage
A little yellow onion
One green pepper
Two mushrooms
Some toothpicks (not the ones with mint flavor…)

How you do it:

  • Slice your chillies lengthwise, and deseed them
  • Mix cream cheese with some finely chopped mushroom, green pepper and onion. You can use almost anything in here, I’m sure shrimp or crab meat would be good, different cheeses, have fun with it and experiment
  • Spread a thick layer of the cheese mix in each chilli half
  • Wrap each chilli half in bacon or pancetta, use toothpicks to secure the bacon if it doesn’t work out without them
  • Put them on the indirect side of your grill and smoke them using apple or cherry wood for 90-120 minutes
  • Enjoy, and watch out for any heart attack symptoms

BBQ Viking’s Turbocharged Canned Beans

Turbocharged can beans!

Beans are real good eats. They’re also a side that work well with almost any BBQ meal. Great on burgers, hot dogs, with steak, pork, chicken… Yup, definitely an essential BBQ side dish. Now, you can make your beans from the ground up, using dried beans and making your own chilli or BBQ sauce from the ground up, that’s phenomenal. But sometimes there’s just not enough time for doing it that way. That’s when I turn to my turbocharged canned beans recipe. It’s basically about going to the store and buying some quality canned beans, and then doctoring them with some fresh chillies and some other stuff, to get to a great side dish with little time and effort. This should recipe is for 4-8 people, depending on what else is being served. Here’s how I do it.

Time: 45-60 minutes + some baking time (optional)
Skill level:Easy

You’re going to need:
3 cans of quality beans (I use S&W’s Texas Ranch Recipe Barbecue beans)
4-8 Fresh chillies of your choosing
4 Scallions, spring onions or even some leeks
A good chunk of quality bacon (about 250 grams or 0.5 pounds)
A couple tbsp of your favorite BBQ rub (optional)
1/2 cup of your favorite BBQ sauce (optional)

How you do it:

  •  Usually I will do this a day ahead, to let the flavours really combine in the fridge overnight. Also, that makes for less side dish focus on BBQ day, and more time to focus on heating meat and drinking beer. Important.
  • Dice your bacon chunk, and heat in your pot on low, so you render as much fat as possible
  • When the bacon is starting to crisp up, finely slice your chillies and scallions, removing chilli seeds and stems if you like less heat
  • Chuck them in the pot and continue frying until everything’s nicely golden, making

    S&W Barbecue Beans cans

    sure not to burn the chillies and scallions

  • Open up and pour in your three cans of beans. Add 0.5 cup of your favourite BBQ sauce. Let simmer for 5-10 minutes. Let it cool and store in fridge overnight, or optionally if you’re short on time, serve as is
  • Next day, I put the beans in a grill-proof vessel, or just leave in the cast iron pan if I have enough space on the grill, and bake the beans with whatever I’m cooking. Before I put it on the grill, I sprinkle with my favourite BBQ rub, which helps form a nice crust on top. Put some wood chips on the coals and you’ll have fabulous baked beans with great flavour in about an hour.
  • Enjoy!

Tasty, creamy coleslaw

Homemade coleslaw. Ah yeh…

Coleslaw is my go-to side for a lot of BBQ and grilling meals. It’s a must for me with any BBQ sandwich, like pulled pork, hamburgers, sliders, steak sandwiches, brisket… It also works great with hot dog, as a side for BBQ chicken, fish…. Coleslaw – what can’t it do! So here’s my standard recipe, and I will get back to you with some more exciting varieties once you’ve got this nailed. Not into the creamy coleslaw? Lactose intolerent? Check out my spicy slaw instead!
Time: 20-30 minutes
Skill level:Easy

You’re going to need:
1/2 head of a large cabbage (or 1 whole medium cabbage)
2 carrots
1 cup of mayo (I suggest the homemade one found here, without the Chipotle)
1/2 cup of sour cream
4-6 tbsp vinegar (I use clear, no-taste vinegar for this)
2-3 tbsp sugar
1 clove of minced garlic (optional)
1 tsp Cayenne Pepper
Salt/pepper

How you do it:

  •  Put the mayo, sour cream, vinegar, sugar, optional garlic and cayenne pepper in a container large enough to hold all your slaw. Whisk it all together, season with salt pepper, and adjust vinegar vs sugar levels to your tastes
  • Peel the carrots and grate them into the dressing
  • Thinly slice the cabbage (leave out the middle white stem part, it can be quite bitter)
  • Put on some vinyl gloves (indispensable), and mix it all well together
  • I like to make this some hours in advance, I think it tastes better when it sits a little bit. It will also keep well in the fridge for some days if you have leftovers.

Spicy Bacon Potato Salad

Spicy Bacon Potato Salad

A good potato salad is a great side for almost any BBQ dish. It’s also something that can be made the day before, stored in the fridge, and served cold.

Which in turn means you can focus on the preparation of meat when you need to, which is good. It also means it’s a great side to bring to the park, the beach or camping.

Time: 20-30 minutes
Skill level: Easy

You’re going to need:
12-15 Medium-sized red-skinned potatoes
About 1 cup of Homemade Chipotle Mayo (you can always substitute for store bought mayo mixed with chipotle hot sauce, but it won’t be as tasty then)
4 tbsp of Honey Dijon Mustard (I use Maille brand, the French know their mustard)
4 Scallions
6 thin strips of quality bacon
Salt/pepper

How you do it:

  • Slice your bacon in small slices, and fry in a pan over low heat. I like to grind some pepper on it while frying
  • Wash and dice your potatoes (I leave the peel on, it looks nice, and I’m also lazy)and boil them until they’re just about soft, not too long. Rinse in cold water and let drain in a colander
  • Whisk the mustard into the mayo
  • Slice your scallions in thin slices
  • Put potatoes in a bowl and mix with scallions, bacon and the dressing
  • Serve lukewarm of refrigerated and enjoy!