Sweet and Smoky BBQ Sauce

Sweet and smoky sauce!
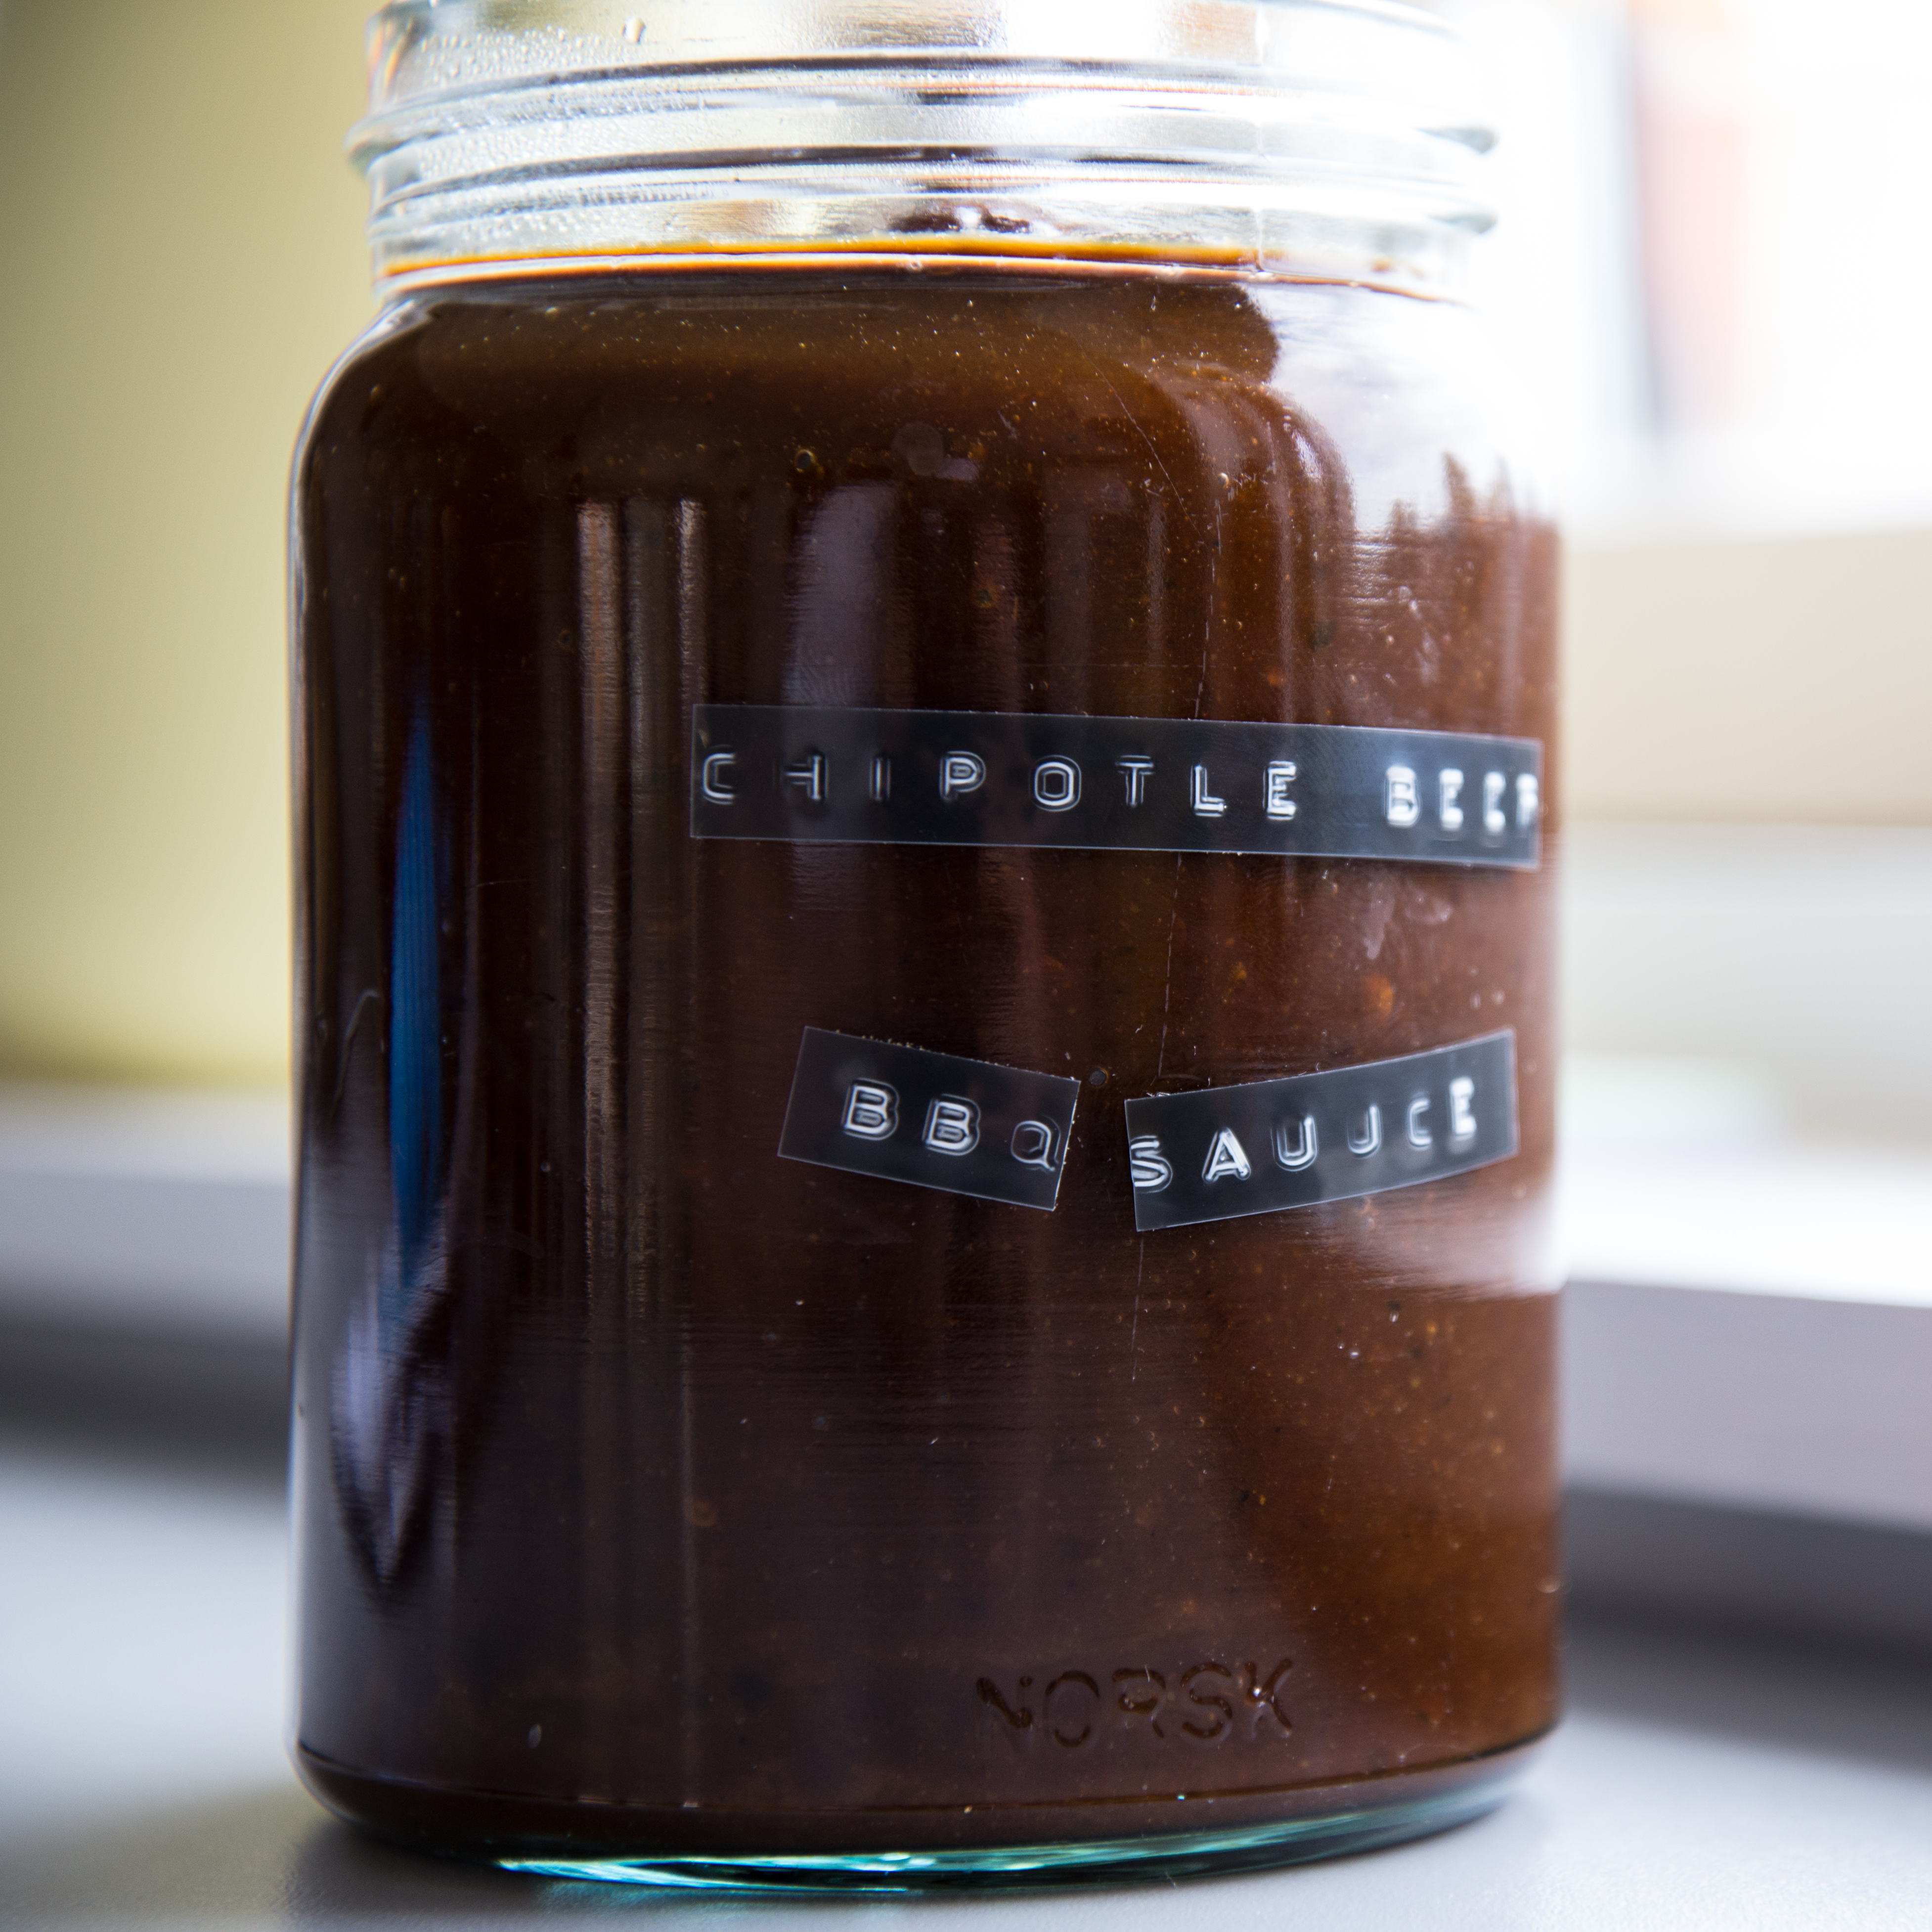
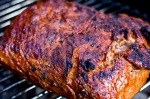
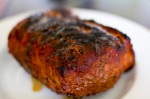
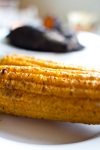
Been a long time since I posted a BBQ sauce recipe, so here is another favorite. Not very spicy, but smoky and sweet. Goes great with sausage, pork ribs, chicken and pulled pork sandwiches, and a favorite at my house for the people who can’t take the heat of a lot of my other stuff.

Time: 30 minutes
Skill Level: Easy

You’re going to need:
3 tbsp dark brown sugar
1/4 cup of honey
1/4 cup of molasses
4 tbsp of Worcestershire sauce
2 tbsp liquid smoke
2 tsp chili powder
1 tsp ground cloves
1 tsp cinnamon
1 tsp ground black pepper
1 tsp maldon salt or more to taste
2 tbsp fine grain mustard
2 tsp garlic powder

1/2 cup apple cider vinegar
2 cups of ketchup

Sterilizing jars in the oven. Easy!How to do it:
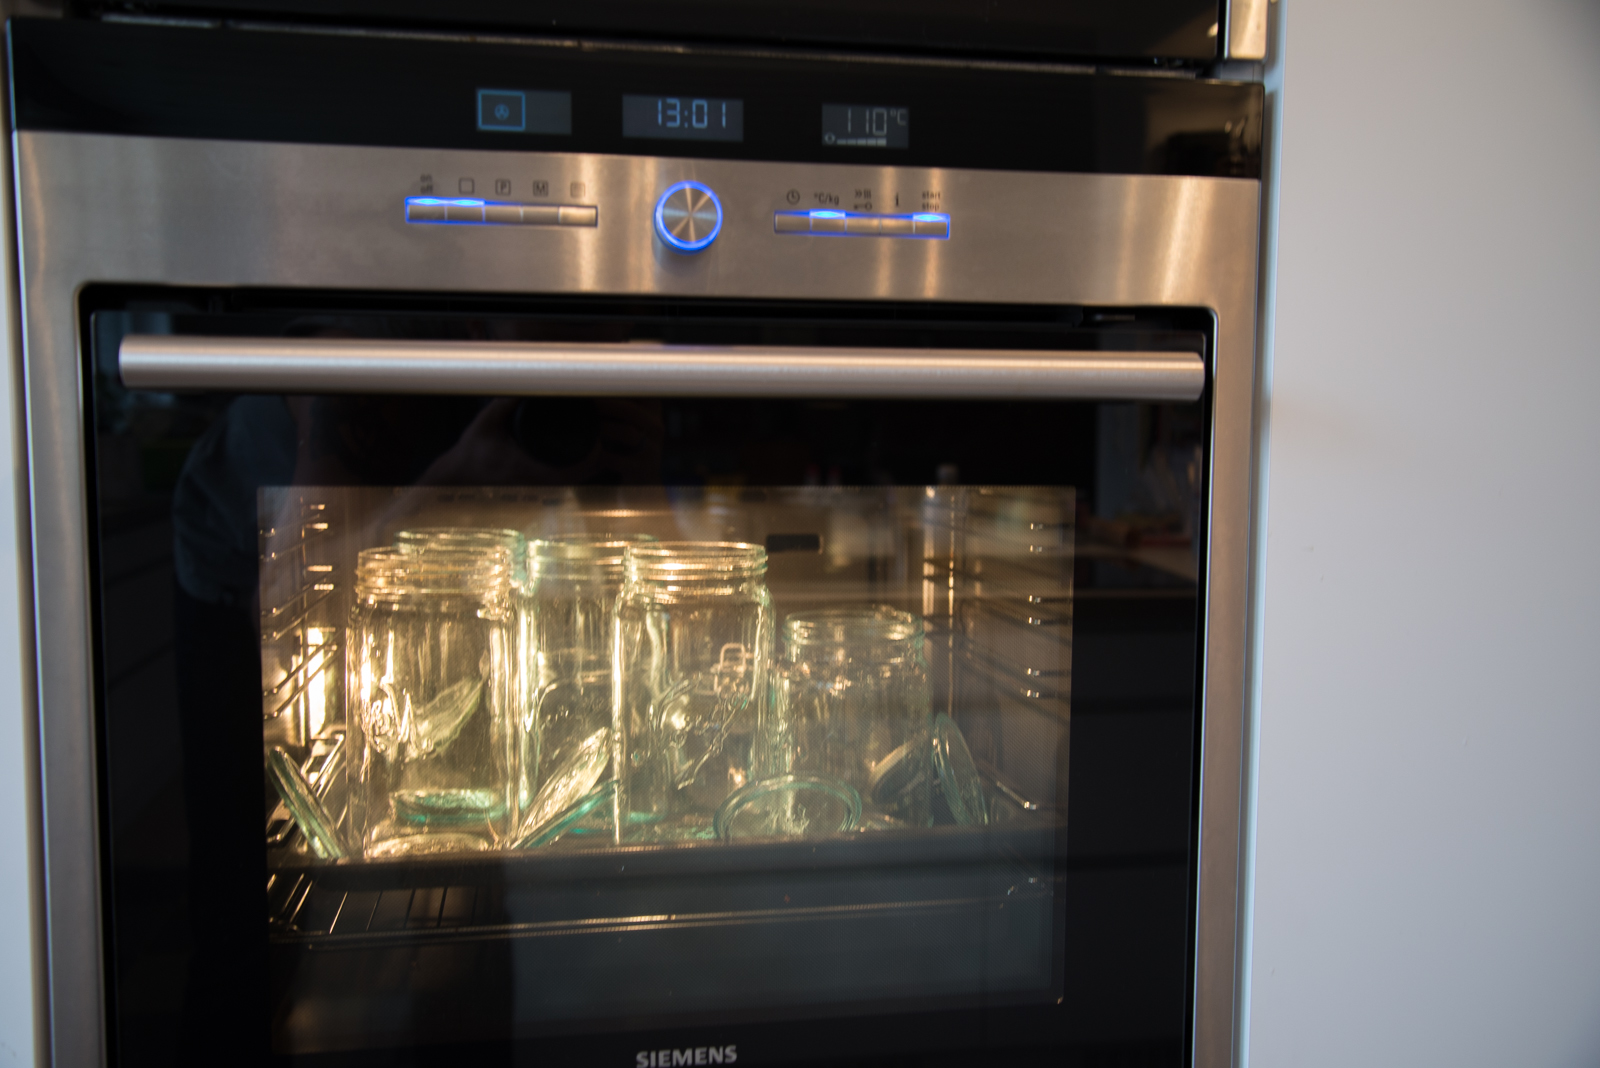
This couldn’t be easier. Chuck everything except the ketchup in a saucepan, stir well and bring to a boil. Let simmer for 10 minutes. Add the ketchup, bring to boil. Taste. Add vinegar, sweetener, salt and pepper until you get your preferred flavor. Let cool, put in jars. Keeps for months in the fridge if you use sterilized jars.


Advertisement

Chipotle Beef BBQ Sauce

Chipotle BBQ Sauce for beef ribs!Came up with a new BBQ sauce today. The plan is to use it for beef short ribs, so that’s what I thought about when coming up with the flavour profile for it. It’s slightly sweet, very tangy, and as spicy as you want to make it. I ordered some delicious dried Chipotles from iHerb. They’re kinda hard to come by in Norway. If you can get them locally where you live, consider yourself lucky. Here’s what I did.

Time: 45 minutes
Skill Level: Easy

You’re going to need:
1 yellow onion
6 dried, whole chipotle peppers
4 whole fresh chillies (I use some medium to mild ones)
1 tbsp vegetable oil
1 tsp sea salt
1/2 cup apple cider vinegar
1/2 cup A1 Steak Sauce
1/2 cup of ketchup
2 tbsp bourbon
2 tbsp ground cumin
2 tbsp paprika powder (preferably the Spanish, spicy variety)
2 tbsp freshly ground pepper
3/4 cup of brown sugar
2 tbsp molasses

Cooking with chipotles!First thing you want to do is heat up some oil in a saucepan. Then add finely chopped onions, garlic, fresh chillies, and the chipotle peppers. Let them caramelize on low for about 15 minutes, then add the other dried spices and cook another 5 minutes.

Now you can add the A1, the vinegar, the ketchup, and the sugar. let it simmer until you get the desired thickness, and remember the sugar will make it thicker when it’s cold, so if you plan to primarily serve it cold, you should consider that.

Once it reaches it desired thickness, it is time to blend. The cool thing here is you can take out one or more whole chipotles, blend, taste and see how spicy it is. If it’s not hot enough for you, add inn chipotle(s) and blend again until it’s just right for you. How cool is that!?

My wife loves her new Dymo labeller...

Tasty, creamy coleslaw

Homemade coleslaw. Ah yeh…

Coleslaw is my go-to side for a lot of BBQ and grilling meals. It’s a must for me with any BBQ sandwich, like pulled pork, hamburgers, sliders, steak sandwiches, brisket… It also works great with hot dog, as a side for BBQ chicken, fish…. Coleslaw – what can’t it do! So here’s my standard recipe, and I will get back to you with some more exciting varieties once you’ve got this nailed. Not into the creamy coleslaw? Lactose intolerent? Check out my spicy slaw instead!
Time: 20-30 minutes
Skill level:Easy

You’re going to need:
1/2 head of a large cabbage (or 1 whole medium cabbage)
2 carrots
1 cup of mayo (I suggest the homemade one found here, without the Chipotle)
1/2 cup of sour cream
4-6 tbsp vinegar (I use clear, no-taste vinegar for this)
2-3 tbsp sugar
1 clove of minced garlic (optional)
1 tsp Cayenne Pepper
Salt/pepper

How you do it:

  •  Put the mayo, sour cream, vinegar, sugar, optional garlic and cayenne pepper in a container large enough to hold all your slaw. Whisk it all together, season with salt pepper, and adjust vinegar vs sugar levels to your tastes
  • Peel the carrots and grate them into the dressing
  • Thinly slice the cabbage (leave out the middle white stem part, it can be quite bitter)
  • Put on some vinyl gloves (indispensable), and mix it all well together
  • I like to make this some hours in advance, I think it tastes better when it sits a little bit. It will also keep well in the fridge for some days if you have leftovers.

BBQ Gallery – II

Last week’s escapades in grilling and BBQ here at BBQ Viking’s house

Easy Homemade Chipotle Mayo

Homemade Chipotle Mayo

People tend to think homemade mayonnaise is difficult to make. Well it’s not. Here’s my basic recipe for a simple chipotle mayo (just skip the chipotle to make it regular mayo…)

This mayo is great on sliders or in my Spicy Bacon Potato Salad.

Time: 10 minutes
Skill level: Easy

You’re going to need:
2 Egg yolks
1 tsp water
1 tsp Dijon mustard
1 cup of oil (canola, rapeseed, corn oil. no extra virgin, it overpowers everything else)
1 tbsp lemon juice
2 tsp clear vinegar
Salt and pepper
Your favorite Chipotle hot sauce (I like Tabasco or Cholula brands)

How you do it:

  • Put egg yolks, mustard, 1tsp water and 1 tbsp lemon juice in blender. Mix with 4-5 pulses
  • Pour the oil in while mizing continuously in a steady, thin stream. It should take you >2-3 minutes to pour in the cup of oil
  • Once the oil is incorporated and the mayo is thick and creamy (emulsified!), whisk in as much as you like of your favorite Chipotle hot sauce. If you don’t like Chipotle (you’re in the wrong place) you can always use freshly minced garlic or some fresh herbs instead for your flavoured mayo.

Ember-roasted yams

Yams that have been roasted directly on the embers. Tasty!

This is maybe my all-time favorite side dish. It goes well with all meats, it’s healthier than potatoes, and it tastes fantastic. It really couldn’t be easier than putting something right on the coals and leaving it there. The burning of the outside gives the inside a lovely smokey flavor. Best trick ever!
Time: 45-60 minutes total
Skill level: Easy
Grilling method: On the embers
Grill temperature: Doesn’t really matter as long as the coals are white-hot

You’ll need to get hold of:
Yams
(Optional) Butter, garlic, herbs for a herb butter

Yams that have been roasted directly on the embers. Yes I have moved them to the grate for the photo. Don’t do that before they’re finished.

How you do it:

  • No washing or prep needed, because you’re burning the outside to a crisp anyway
  • Just chuck your yams directly on the white-hot coals, turn them every 10-15 minutes until they have a nice, ashy, burnt finish on all sides
  • Prick them with a knife to check they’re nice and soft all the way through
  • Slice in two with a sharp knife, make a garlic or herb butter, mash it up a bit with a fork, and eat!

Spicy Fennel Ketchup aka Ketchup for grownups

Homemade spicy fennel ketchup

I like experimenting with making ketchups. The regular Heinz ketchup is of course aclassic that will live forever, but sometimes it’s good to have a ketchup with more taste to it, especially for spicy sausages and on burgers. In this one, a spicy fennel taste is what I’m going for. This recipe makes about 2 jars of delicious homemade ketchup.

Time: 60 minutes
Skill Level: Easy

You’re going to need:
8 smoked, roasted chillies
2 cans of chopped tomatoes (If you live in a part of the world with GREAT tomatoes, you can use fresh ones instead. Lucky you!)
0,5 cup tomato paste
2 tbsp rapeseed oil
6 tbsp apple cider vinegar
1 cup of brown sugar (I use the sticky kind)
1 tbsp worcestershire sauce
2 tbsp freshly ground fennel seed
1 tsp marjoram
1/2 tsp ground cloves
1 tbsp ground pepper
1 tbsp ground cumin
1 tbsp maldon salt
2 tbsp ground chili flakes

Fennel seeds

Put your smoked and roasted chillies with rapeseed oil in a blender, and blend to a fine paste. Combine with everything else in a saucepan, and bring slowly to a boil. Let it simmer for 45 minutes or until desired consistency is reached. Blend in batches until desired smoothness is achieved. Let it cool to room temperature before putting in containers and storing in the fridge. Sterilize your equipment and jars, seal them properly, and this kind of sauce will stay good for many months in your fridge.

Quick tip: String’em up!

Here’s a great tip for smoking or roasting small pieces of vegetables or any other small things. Get some steel string from your local hardware store, and just string them up, like so. This worked great when smoking a bunch of chillies for my homemade ketchup.

Chillies stringed up on steel string

Rocket Fuelled Bull BBQ Sauce

I make my own BBQ sauces. It’s fun, it’s a lot cheaper than buying them (at least here in Norway), and it means you can tailor the sauce to your particular tastes. I think it’s good to make as much as possible of my food from the ground up, because then I know what’s in it. Call me paranoid, but I don’t always trust the food industry to make the healthiest choices on my behalf… Also, it’s not a very difficult thing to cook. This is a sweet, tangy sauce with quite the kick to it. Which is just what I like for any BBQ beef dish.

Chillies stringed up on steel string and smoking on the BBQ

Time: 60 minutes
Skill Level: Easy

You’re going to need:
1/2 yellow onion
8 whole fresh chillies (I use some medium to mild ones)
1 tbsp rapeseed oil
1 cup apple cider vinegar
2 tbsp Dijon mustard
1/2 cup Worcestershire Sauce
2 tbsp freshly squeezed lemon juice
0,5 cups of good bourbon
1 tbsp ground cumin
2 tbsp paprika powder (preferably the Spanish, spicy variety)
2 tbsp freshly ground pepper
1,5 cups of brown sugar
2 tbsp of liquid smoke (not necessary if you smoke the onion and chillies)

Ideally, I like to smoke and roast the chillies and onion on the grill beforehand, I normally do this while BBQing something else. If you don’t have time for that, just deseed chillies, chop onion, saute in the rapeseed oil, and then put in a blender to make a smooth paste. Combine the paste and the rest of all the ingredients in a saucepan. Whisk once in a while and let it simmer for 30-45 minutes until desired consistency is achieved. Let it cool to room temperature before putting in containers and storing in the fridge. Sterilize your equipment and jars, seal them properly, and this kind of sauce will stay good for many months in your fridge.

The finished sauce. I still draw at a kindergarten level, I know. Thanks.

BBQ Gallery – I

Just some pictures from today’s BBQ-related cooking here at BBQviking’s house…