BBQ Grunnkurs – Røkt Bratwurst

Smoked bratwurst is great "waiting food" if you've got some spare room and you're doing a long cook.

Røykt bratwurst er perfekt ventemat hvis du har litt ledig plass i grillen og driver med ett langtidsprosjekt som for eksempel pulled pork

Så du har grillet en stund, og vil prøve deg på ekte “low & slow” BBQ? Da er dette det definitive stedet å begynne!

For mange betyr det å fyre opp grillen en ting: pølser. Det som ikke er så bra er at pølser ofte betyr kjedelige, usmakelige, ferdigkokte gufne greier fra en eller annen fabrikkprodusent. Jeg blir svimmel bare jeg ser på ingredienselisten til enkelte grillpølser man kan finne hos de store butikkkjedene. En god pølse skal stort sett inneholde tre ting: kjøtt, fett, og krydder. Og en god pølse skal deifnitivt ikke være ferdig trekt/kokt på fabrikk. Når du først har smakt pølser som var rå da de ble lagt på, og så har fått røyke sakte på grillen i ett par timer kommer du til å være kurert for å spise vanlige grillpølser, det er helt sikkert. Hvorfor skal pølser være ferdig trekt? Ville du kjøpt en ferdigstekt biff til å varme på grillen? Ferdig kokt svineskulder? Ferdig kokte spareribs? Hvis du alt dette høres flott ut, er du på feil blogg. Så, som utgangspunkt trenger vi rå pølser. I Oslo fås min favoritt, rå bratwurst, hos Strøm-Larsen. Men sommeren 2014 selges også rå pølser i vanlige butikker over det ganske land. Kvaliteten er ikke helt som Strøm-Larsen sine, men de er uendelig mye mer smakfulle enn sine ferdig trekte søsken i pølsedisken. Anni’s Pølsemakeri i Mathallen har også ett bra utvalg.

Serveringsforslag:

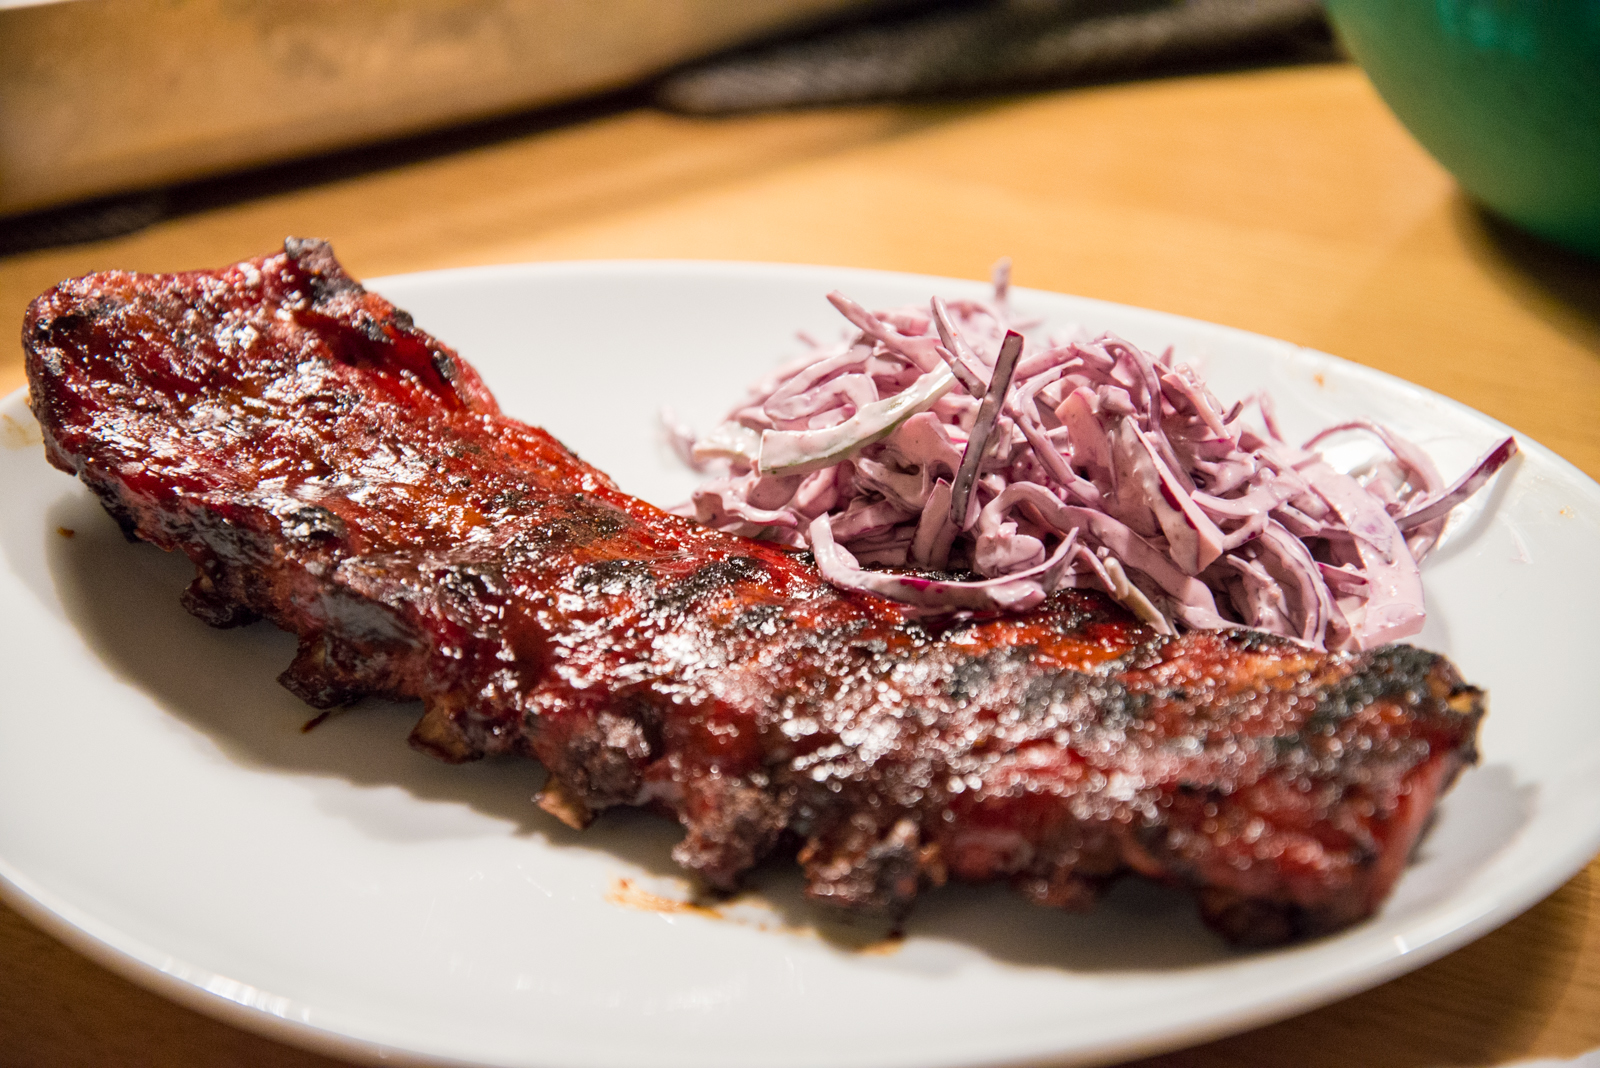
Jeg serverer disse pølsene på hjemmelagde burgerbrød, med litt coleslaw, pickles, litt hjemmelaget ketchup, en god hjemmelaget sennep, og noen ganger også litt rødløkskompott. Denne kålsalaten med grønne epler er også perfekt til pølsene!

Total tid: 90-120 minutes
Vanskelighetsgrad: Nybegynner/Middels
Grilloppsett: Indirekte, en-sone
Grill temperature: Cirka 110-120 grader celsius på risten

Du trenger:

  • Rå kvalitetspølser (bedre med for mange enn for få, restene fungerer nydelig til omelett eller frokost neste dag)
  • Rundstykker eller brød (hjemmelaget er selvsagt best)
  • Tilbehør som nevnt over
  • Grillkull eller briketter (jeg bruker kun naturlig kull, hvis du bruker briketter sørg for at du bruker noen av god kvalitet)
  • 1 kopp med røykflis (Jeg liker å blande hickory og eple til disse pølsene, les mer om valg av røykflis her)
  • Ett hurtig termometer, som for eksempel ThermaPen

Fremgangsmåte:

  • Fyr opp skorsteinen din ca. halvfull med briketter eller kull (basert på standard Weber kulegrill)
  • Mens kullet blir klart, putter du en brikettkurv på ene siden av grillen, og en stor rustfri stålpanne full av vann i midten av grillen (se bildet). Du kan også bruke engangs grillpanne, men det er både mer økonomisk og mer miljøvennlig å kjøpe seg en stålpanne som kan brukes igjen og igjen (de har en billig en på Ikea). Hvorfor vi skal ha vann på grillen? For det første gjør massen i vannet at det er letter å holde jevn temperatur når man røyker, for det andre bidrar vannet til å holde miljøet fuktig i grillen gjennom hele røykingen.

    The setup for smoked brats. A great place to start when you're getting into BBQ style grilling.

    Oppsett for røykt bratwurst. Liten kurv med kull på ene siden, og røykflis som har ligget i bløt og så pakkes i alufolie.

  • Når kullet er hvitt, heller du det over i brikettkurven på grillen.
  • Putt to røykbomber (en håndfull bløtlagt røykflis pakket i aluminiumsfolie) over det glødende kullet. Vent til de begynner å produsere røyk før du legger på pølsene.
  • Legg på pølsene og lukk lokket. Bruk nederste ventil til å justere temperaturen, prøv å holde den rundt 110-120 grader.
  • Legg på nye røykbomber nå det slutter å røyke, men ellers bør lokket være på mest mulig, ingen sniktitting!
  • The brats are ready to. Look at the fantastic coloration from the smoke. Oh man!

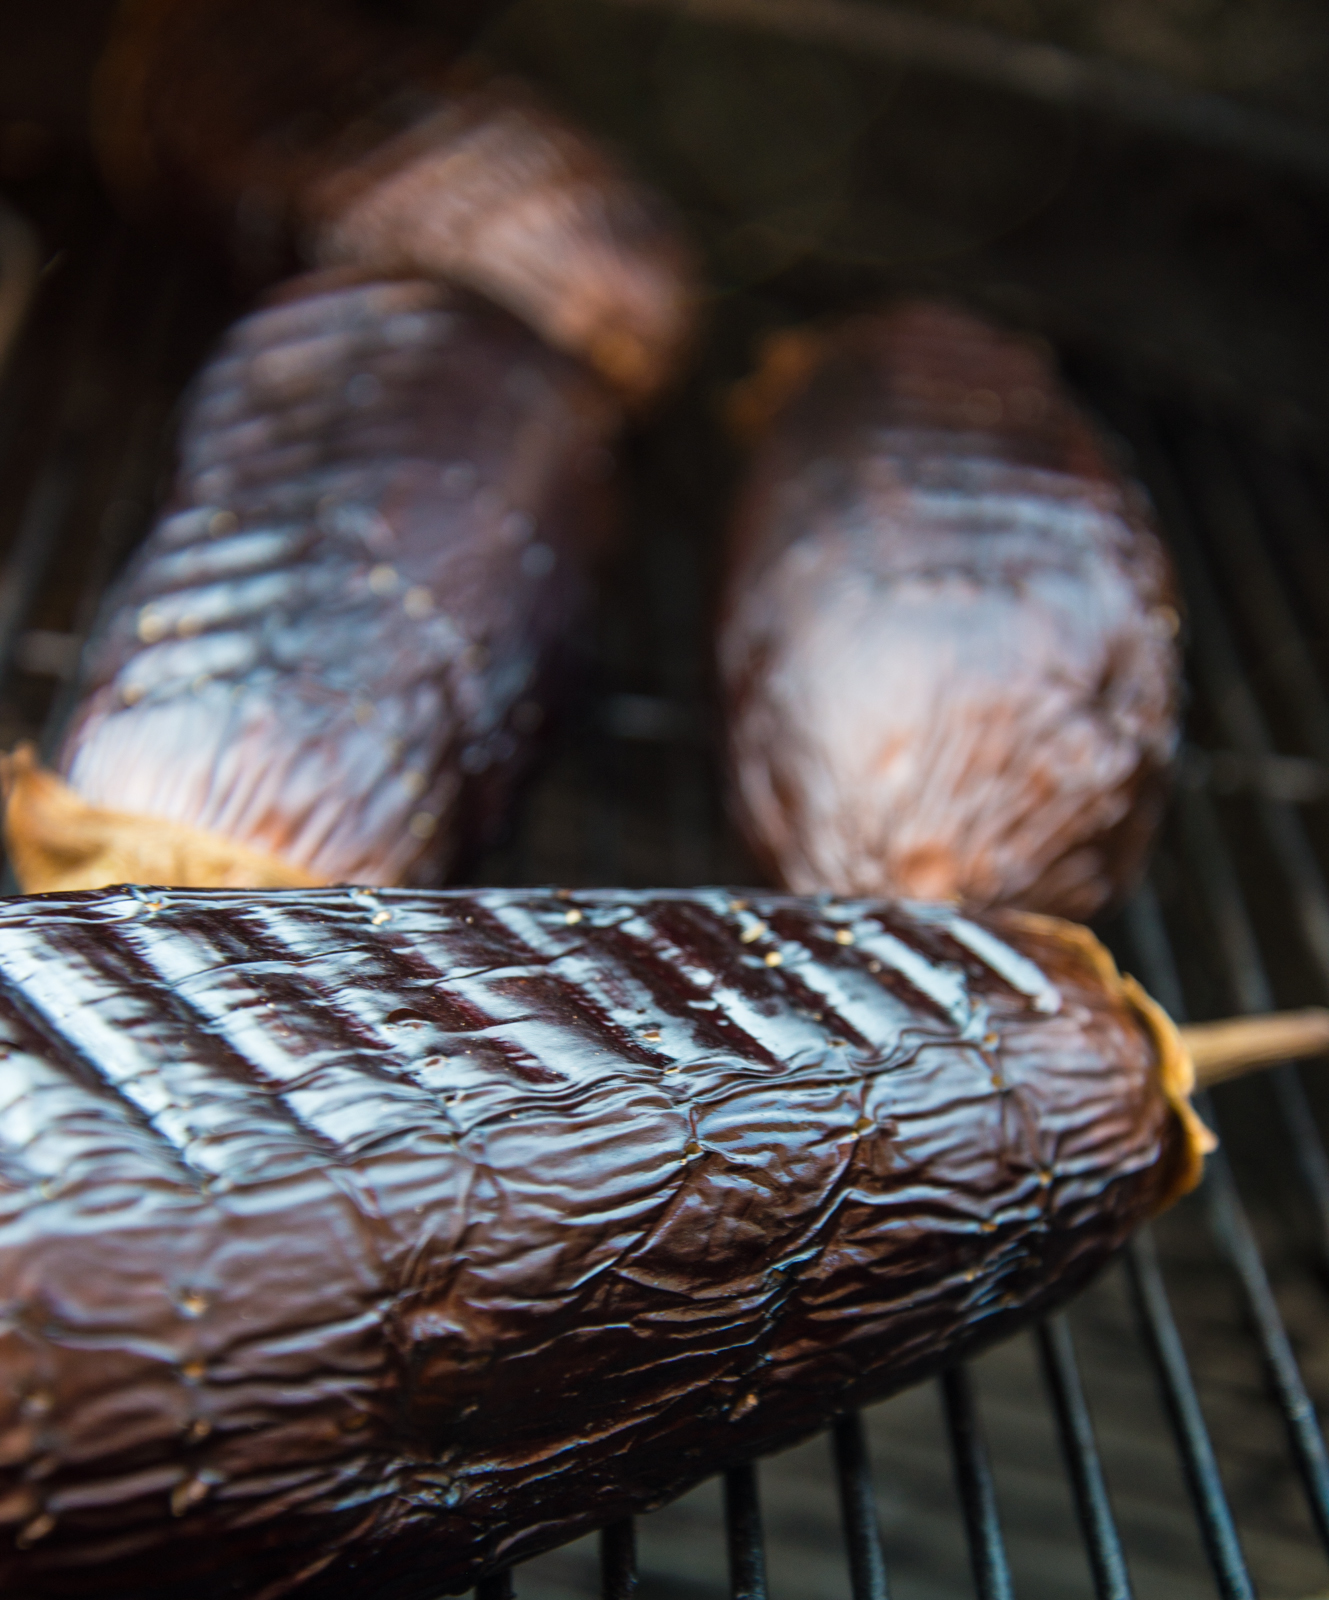
    Slik ser pølsene ut når de er klare til å spises. Se den nydelige fargen pølsene får av røyken fra flisen!

    Etter ca. 60-90 minutter burde pølsene være klare. Hvis en av dem sprekker, har du for høy temperatur, lukk nederste ventil helt og la temperaturen synke, og hold lokket på. Bruk ThermaPen til å sjekke temperaturen, det er viktig at rå pølser er gjennomstekt! Jeg pleier steke mine til 85 grader celsius, de er fortsatt ekstremt saftige og gode på grunn av den lave grilltemperaturen.

  • Da er det bare å spise da!

Smoky aubergine purée

Roasted aubergine. Not quite done yet.Aubergine puréee is an easy side dish to make on the grill. It goes particularly well with lamb, but also works nicely as a side for steak or venison. Here’s how I normally do it.

Time: 60-90 minutes
Skill Level: Easy

What you will need:
4 large aubergines
2 whole garlic
1/2 cup of good olive oil
1 lemon
Salt/pepper

How to do it:

Get your grill ready for indirect cooking at about 175-200C (350-400F)First, prep the aubergines by stabbing them repeteadly with a fork all over. This can be fun, imagine you’re stabbing someone you really don’t like! Or don’t. Once the grill is ready, chuck the aubergines and the whole garlic on the coldest side of the grill, and roast them for about 45-60 minutes. When the aubergines are done they will feel noticeably softer than they were. Get everything off the grill. Peel the aubergines and chop them roughly, put them in a blender. Squeeze the now soft garlic “meat” out of the whole garlic. Mix it all up in a blender, while slowly adding the olive oil. Add juice from the lemon and salt and pepper to taste. Serve!

DSC_1981


BBQ 101 – Baby Back Ribs

Delicious, glazed BBRs!Once you have mastered the art of Smoking Bratwurst – it is time to up your game a little and try your hand at another BBQ staple: Baby Back Ribs!

A lot of people’s favorite food of the smoker, BBRs are not to be taken lightly. I like to make mine tender, but not fall-off-the-bone tender. A lot of (gruesome) chain restaurants have made people think that BBRs should be cooked (I believe they steam/braise them at most of those restaurants) so they can be eaten without teeth. I tend to disagree, and go more for the BBQ competition level of doneness, ie tender, but not doughy and fall-of-the-bone. Anyway, if you want fall-of-the-bone and/or do not have teeth, I will teach you how to do that too.

Serving suggestion:
I like to serve my BBRs straight up with a coleslaw on the side and some homemade pickles. For this occasion photographed, I made my regular creamy coleslaw recipe but substitued regular cabbage with the red one for some interesting color combos. Some people like extra sweet and smoky bbq sauce on the side!

Total time: 3-5 hours
Skill level: Intermediate
Grilling method: Indirect, one-zone
Grill temperature: About 110-120 degrees centigrade (230-250F), more for the finishing

You’re going to need:

  • As many racks of ribs as there are people, at least. Some people can muster 1.5 racks too
  • A rib rack can be a nice way to fit more BBRs on your grill, they do take up a lot of space
  • Some lump charcoal or charcoal briquettes (make sure you get good ones with no chemicals and food starch as a binder)
  • 1 cup of wood smoking chips (I like to use apple or cherry for baby back ribs, read more about smoke wood here.)
  • An instant-read thermometer like a Thermapen is useful too
  • Your favorite BBQ rub – this one works well for ribs too.
  • Your favorite BBQ sauce for glazing at the end if you want to. I like a sweet and smoky style sauce for ribs, not too spicy. Your favorite store bought or homemade one will do!

How you do it:

  • We are going to use the three step method for doing BBRs. That means step 1 is BBRs, coleslaw and pickles. Who needs more? Hai, beer!smoking the ribs, step 2 is foiling and steaming, step 3 is finishing/glazing. This method is sometimes referred to as the 3-2-1 methods, where the numbers refer to number of hours in each step. Anywho – the goal is not to achieve 3, 2 and 1, but to achieve rib perfection, so your mileage on those may vary, but as a guideline it is sound.
  • Prep the baby back ribs by removing the membrane from the bone side. It’s very easy to do, check out a video over here if you don’t know how.
  • Fire up your grill or smoker and try to stabilize the temperature in the desired range of 110-120C (230-250F). On my Webers I will use a water pan to help me out in the stabilizing, it adds both mass and moisture inside the grill. On my Primo Grill I don’t really need that, and I also like to put the meat in when the grill is warming up, so it can get the maximum amount of smoke time. Remember to get good smoke going before putting in the meat.
  • Smoke the meat for as long it takes for the racks to reach 80-90C (175-195F)in the meatiest parts. The longer you spend on this step, the more smokey flavors.
  • Once they are smoked, it is time for step 2, the foiling and steaming of the ribs. Put them in a stainless steel pan on top of a rack, or on top of some crumbled up foil so they don’t touch the bottom, add a cup of water or apple juice, and cover with two layers of foil so it’s fairly airtight. Place the pan back on the grill.
  • Now for steaming time, this can take anything from 45-120 minutes. The best way to find out if they are finished is to check every 15 minutes towards the end. Take the foil off, wiggle the bones, pole them a little bit. When they are close to done, the meat should loosen from the bone with not too much effort. If you want them chain restaurant style, toothless done, they should start coming apart if you try to lift from one end.
  • Whenever your preferred doneness is achieved, take the pan of the grill, and DSC_1781increase the grill temp to about 150-160C (300-320F). This is the best temperature for the third and last step – finishing the ribs.
  • The reason you don’t go above 160C/320F for the finishing, is that at about 175C/350F, sugar will burn. This means your BBQ sauce and possibly your rub will turn from sweet to nasty in no time.
  • So, once stabilized at the new higher temp, lay out the ribs again, and brush them with a layer of your favorite BBQ sauce on both sides. Leave them on the indirect side 10 minutes, add another layer and flip, and leave them for another 10 minutes. After this they should have a nice, glossy laquer to them, and they should be finished, so serve it up!
  • ENJOY!

BBQ 101 – Smoked Bratwurst

Smoked bratwurst is great "waiting food" if you've got some spare room and you're doing a long cook.

Smoked bratwurst is great “waiting food” if you’ve got some spare room and you’re doing a long cook.

So you’ve been grilling a little, and want to try your hand at low & slow style BBQ. This is the definitive place to start!

For a lot of people firing up the grill means hot dogs. Which is great. What is not so great, is that it all too often also means bland, cheap, mystery meat pre-boiled sausages with about 20+ ingredients in them. A good sausage should have three basic ingredients: Meat, fat, and spices (and a casing of course). No preservatives, potato flour or corn starch. No secret chemicals. And once you’ve tasted slow-smoked sausages that were uncooked when you started, you’re never going back to pre-boiled ones. Would you buy pre-boiled ribs? Pre-boiled pork butt? If you would, please step away from my blog. So, either make yourself some sausages, or head down to your local butcher or quality food store and get you some of the real stuff. They’re much more filling too, so instead of eating five, you might eat two. In this recipe I like to use raw bratwurst from my local sausagemaker / butcher shop here in Oslo, Strøm-Larsen. One of few places in Oslo that sell uncooked sausage.

Serving suggestion:
I serve these sausages with homemade hamburger buns, a creamy coleslaw,  some pickled gherkins, some homemade ketchup, some quality mustard and sometimes also a little red onion compote.

Total time: 90 minutes
Skill level: Beginner/Intermediate
Grilling method: Indirect, one-zone
Grill temperature: About 110-120 degrees centigrade (230-250F)

You’re going to need:

  • Quality uncooked bratwurst, chorizo or other uncooked sausages.
  • Some form of bun or bread
  • Condiments as mentioned above
  • Some lump charcoal or charcoal briquettes (make sure you get good ones with no chemicals and food starch as a binder)
  • 1 cup of wood smoking chips (I like to mix hickory and some apple or cherry for sausages, read more about smoke wood here.)
  • An instant-read thermometer like a Thermapen, or a leave-in probe style thermometer

How you do it:

  • Fire up your chimney starter with 20 briquettes or lumps of charcoal (this is based
    The setup for smoked brats. A great place to start when you're getting into BBQ style grilling.

    The setup for smoked brats. A great place to start when you’re getting into BBQ style grilling.

    on my 22.5″ Weber kettle, and your mileage and/or method may vary on other grills and smokers)

  • In the meantime, put a briquette basket on one side of the grill only, and a big water pan covering the whole middle part of the grill. Why water you say? The mass of water (I use a stainless steel pan from Ikea that holds about 4-5 liters or one US gallon) helps me maintain a steady temperature inside the kettle, because water stores (in this case) heat pretty well. It also helps the meat retain its moisture during the long cook by increasing the general moisture in the cooking environment.
  • When your briquettes are white hot, put them in the briquette basket you put on the one side of the grill.
  • Put two smokebombs (a handful of soaked wood chips wrapped in aluminium foil) on the briquettes. Putting them out towards the edge of the fire makes them last longer. Wait 5-10 minutes until they start smoking. Replace these as often as you please once they are smoked out. This is especially important the first 4 hours, after that the meat won’t really soak up the smoky flavours anymore.
  • Put the grate on, sausages away from the fire on the opposite side, put the lid on
  • Refill with wood chips when it stops smoking
  • The brats are ready to. Look at the fantastic coloration from the smoke. Oh man!

    The brats are ready to. Look at the fantastic coloration from the smoke. Oh man!

    After about 60-90 minutes sausages should be ready. If one of them bursts, you’re running too hot. Don’t do that. Use your thermapen to check the temperature, uncooked sausage HAS TO be cooked all the way through, ground meat is something you don’t serve rare. I usually take them off the grill when they’re at 85C/185F

  • Enjoy!