Lamb Chops grilled with Hickory and Rosemary smoke

Grilling and smoking lamb chops with rosemary and hickory smoke

Grilling and smoking lamb chops with rosemary and hickory smoke

There’s not much that can top some fresh young lamb for the grill. In this recipe we’ll pair it with some hickory and rosemary smoke, raw spring onions finely chopped and a delicious mint oil to go with your preferred side. Let’s roll!

What you need (to serve 4):

  • 2 racks of young lamb (3 if they’re small, and small is good here)
  • A fistful of fresh rosemary
  • A fistful of hickory wood chips
  • 6-8 spring onions
  • A cup of good olive oil of the extra virgin variety
  • A fistful of fresh mint
  • A Thermapen or similar instant-read thermometer is very useful for this one

How to make the mint oil (can be made a few days ahead, and should at least be made the night before for max flavor):

  • Finely chop the fresh mint
  • Combine with a pinch of good sea salt and about a cup of quality olive oil in a mortar, and crush away
  • Pour into a jar and leave it in the fridge overnight or for a couple days to let the oil take the flavor

How to grill the lamb:

  • Get your firestarter going, fill it up to the top with coals. For this you want the 50/50 setup so you can sear the chops on one side of the grill, and then move them over to the other side for finishing
  • Once your grill is nice and hot, might be a good time to dump some yams on there for a side dish, my recipe for ember-roasted yams is great with the mint oil.
  • Slice a nice little diamond pattern in the fatty parts of the rack, making sure not to Lil' lamb chops - all ready to go go goslice into the meat. This is to help the fat render, and to help with the crispiness of the skin. Important!
  • Cut your lamb racks into “chops” in the order of two bones on each. Doing one boned chops is possible, but you’re going to need your grill to get REALLY hot to pull that off – so let’s go with two. It’s a handy compromise
  • Season the chops with salt & pepper
  • Once your yams (if youre doing those) are done and out of the way, get the grill real hot (you want the grate to be so hot it whitens for this one), and chuck in the rosemary and hickory chips right on the coals.
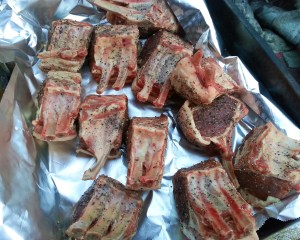
  • The smoke will start fairly instantly, so get your chops on there (I usually do fatty side down first), and put the lid on for about a minute. Repeat for all sides so you get a good sear all round.
  • When you’re done searing, move the chops to the “cold side” of the grill, and take their temp. Continue to do so until they’re all done (I usually go with 56C/132F, nice and pink in the middle, tastes great!)
  • Give the chops a five minute rest while you finely chop some spring onion
  • Serve on warm plates, with abovementioned yams sprinkled with mint oil and spring onion
  • Enjoy!
Advertisement

Techniques : Grill setups for direct, indirect and rotisserie grilling

So, I get some questions on how I do different things on the grill, among other things how to keep a steady low temperature for low and slow BBQ on the standard Weber kettle. I have made the attached drawings to help me explain this better. Feel free to print and use this diagram as a reference, but don’t steal it and use it on your own webpage without asking me first, it took me some work to make it. Take a look at the diagram first, and below I will explain the different setups and what I use them for.

Grill setups for direct, indirect and rotisserie grilling

Okay, let’s start top left:

    • Indirect, two-sides: I use this when making roasts and other large pieces of meat. It’s good for a medium-low temperature, but can also go up to medium-high, just make the fire mounds on both sides bigger. I use this type of setup for instance for Whole, Smokegrilled Trout
    • Indirect/direct 50/50: This is perhaps my most used setup. It can go from medium to high heat, and it’s very versatile. You can grill indirect sides on the right side and have heat for searing meat and other thing on the left side. You have large safety/resting zone too, if you have larger piece of meat you want to sear first and then finish indirectly. I use this type of setup for instance in my Smokegrilled Mackerel recipe
    • Indirect/direct pile: This can be a good setup if you need a quick sear on something and then need to rest it a while after. I can see that it would be useful for thick t-bone steaks, for instance. You can also start with this for searing a roast or similar large piece, and then rake it out to both sides after for a long indirect cook.
    • Ring of fire: Haven’t experimented much with this one either. I can tell you I put it in there mostly for the name. I guess it could be good for indirectly grilling a very large piece of meat, it would give you a more even heat than some of the other options
    • Indirect, one-sided (low and slow!): I use this method for two things. Firstly,I use it when doing beef short ribs and pulled pork, in 12-16 hour sessions. I will then use a very minimal amount of briquettes, all on one side, 12-20 briquettes at a time, depending on the weather outside, and I use a large steel drip pan filled with about 4 litres (a gallon) of water in the middle of the grill. The purpose of the water is primarily to store heat and help me keep the temperature stable, but it also makes for a moist environment inside the grill. Adjust temperature using the bottom vent only, always leave top vent open. The second thing I use this for is rotisserie grilling chickens, ducks and other things. I will then use charcoal normally, and much more of it. No problem getting to 200-250 degrees centigrade (390-480F) with one big pile up against the side wall
    • Direct, all: I’ve only used this setup for one thing, but for that it’s very useful. We were having a big party, and I used the kettle for making a ton of chicken wings (only the small, outer wing part). For that, it was ingenious. A thin layer of coals over meant I could do 30-40 wings at a time on the grill as they needed no indirect grilling, only a good sear. Very efficient for making lots of sliders too I would imagine
    • Direct/indirect, two-zone fire: This is really a lot like the 50/50 setup, just with a smaller safety zone. Use when you need more sear space and less resting area.
    • Direct/indirect, three-zone fire: This is the most complicated setup. On the left 1/3rd of the grill there is a thick layer of coals for very high heat, the middle third has a thinner layer, and then there’s a safety zone to the right for resting. It’s just another option that might suit you depending what combination of food you’re grilling.

Yeah, that was a lot wasn’t it? I primarily use only 2-3 of these regularly, but it’s always good to know your options. Some common things to remember; always put a drip tray under your meat/fish when grilling indirect, you don’t want all the fat to drip and stick to the bottom part of your kettle. Another important point, when you set up, try to keep your coals away from the handles when you can. It will just be easier if you need to move the grill around during cooking if the handle sides don’t get too hot.