
This gallery contains 18 photos.
Here it is! The third installment in my popular BBQ Gallery series. Enjoy!
This gallery contains 18 photos.
Here it is! The third installment in my popular BBQ Gallery series. Enjoy!

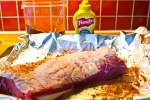
Homemade coleslaw and pulled pork sandwich. Ah yeh…
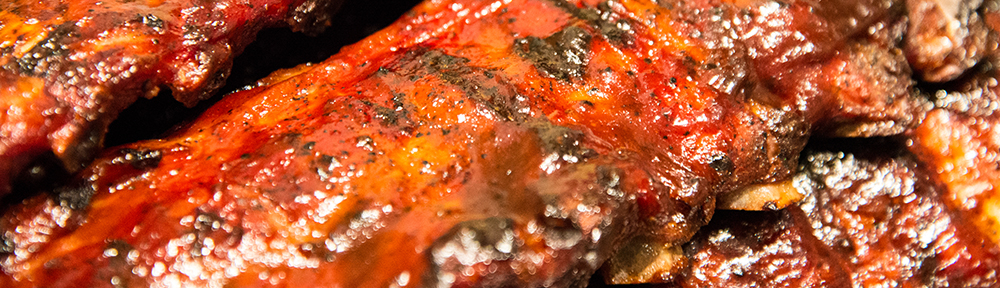
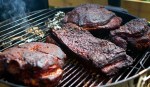
Pork butt is a fantastic piece of meat. It’s quite a tough cut, with a lot of collagen (and fat), which makes it perfect for low and slow BBQ. If you can’t get pork butt where you live, you can try a boned-out ham. However, the best cut for this is the pork butt which is essentially the upper part of the pork shoulder ham cut, here in Norway not a regular cut, but when I tell my butcher I want the upper part of the ham, basically the shoulder-blade, with all the meat and fat on it, I get the right thing. Keeping the bone in there helps the meat become more juicy because the bones contains gelatine, so I always get bone-in when I can. Gives you that lip-smacking goodness feel you get from good ribs. Guess that’s why gelatine is used a lot for making candy, huh… That goes for any meat – bone-in = better. Talk to your butcher and show him some charts and google images, and I’m sure you’ll get it right. Now, to get a historical fact out of the way, they’re not called butts because they’re from the butt (because they’re from the shoulder end of the pig really..), but because this cut was stored in special barrels known as butts, in the olden days. Read more on Wikipedia.

Pork butts ready for pullin’
This is not a good place to start for the novice griller, but if you think you’ve got indirect grilling and temperature control on your kettle or smoker down, you should try it. Pork butt is some of the best eats to ever come out of a BBQ, and it’s a cheap cut, which enables you to feed tons of people for little money. Time for a party, in other words. Let’s get to it.
Serving suggestion:
I serve this dish in a very traditional manner, on homemade hamburger buns, with a creamy coleslaw, a basic Eastern North Carolina style vinegar sauce, and some pickled gherkins. Don’t make it complicated, the meat should be the star.
Total time: 10-14 hours (prep starts the day before)
Skill level: Intermediate/Expert
Grilling method: Indirect, one-zone (some coals on one side, large drip pan filled with water under the meat)
Grill temperature: About 120-140 degrees centigrade (250-285F)
You’re going to need:

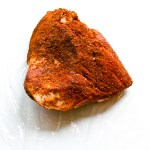
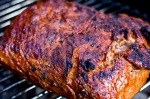
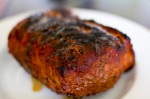
Pork butt, rubbed and ready to go
How you do it, the night before:
How you do it, cooking day:

Taking notes is paramount if you want to learn
Fire up your chimney starter with 20 briquettes (this is based on my 22.5″ Weber kettle, and your mileage and/or method may vary on other grills and smokers)

Two butts, a ham and a cow chest
should be easily pullable by hand. Here’s a neat tip, get some thin carpenter’s gloves from your local hardware store, and buy some vinyl gloves one size up at the supermarket. Put the builder’s gloves on first and then the vinyl gloves (duh!), and you will be able to pull two pork butts without burning off your fingers (I’ve tried, not fun). If it’s not easy to pull by hand, you took it off the grill prematurely. Don’t worry, use a knife to assist you, it should still taste great. If it does not taste great, you have failed, and consequently brought shame upon your house and family.
Last week’s escapades in grilling and BBQ here at BBQ Viking’s house


Sliders, homemade chipotle mayo, shakey taters and caramelized onions
These sliders are tasty, juicy (even when you have to cook them through), and are real popular with the kids. They’re easy to make too, and require only a quick sear on the grill. You could always buy some slider buns, but I really suggets making your own, see my recipe for buns here. I realize some of you are going to find it extremely controversial that I put bread in my sliders. Don’t knock it till you’ve tried it. I mean it. If you grind your own beef, and have a hot enough grill to get a sear on these while they’re still pink in the middle, you can skip the bread. But I often have to use storebought ground beef, and that means it has to be cooked all the way through. That’s where the bread comes in, by soaking up the juices and fat, it makes these sliders a real, juicy treat.
Time: 60 minutes total
Skill level: Easy
Grilling method: Direct
Grill temperature: About 250 degrees centigrade (480F)
Equipment: Hickory wood chips for smoke
Serve with:
Homemade chipotle mayo
Homemade slider buns
Shakey potatoes (recipe to come)

You’ll need to get hold of:
Ground beef, about 500 grams makes about 15 sliders
2 slices of bread
4 tbsp of your favorite, preferrable homemade, BBQ sauce. I used Rocket Fuelled Bull BBQ Sauce
Some meltable cheese (I prefer orange cheddar)
2 large yellow onions
2 tbsp butter
How you do it:

Yams that have been roasted directly on the embers. Tasty!
This is maybe my all-time favorite side dish. It goes well with all meats, it’s healthier than potatoes, and it tastes fantastic. It really couldn’t be easier than putting something right on the coals and leaving it there. The burning of the outside gives the inside a lovely smokey flavor. Best trick ever!
Time: 45-60 minutes total
Skill level: Easy
Grilling method: On the embers
Grill temperature: Doesn’t really matter as long as the coals are white-hot
You’ll need to get hold of:
Yams
(Optional) Butter, garlic, herbs for a herb butter

Yams that have been roasted directly on the embers. Yes I have moved them to the grate for the photo. Don’t do that before they’re finished.
How you do it:

Homemade spicy fennel ketchup
I like experimenting with making ketchups. The regular Heinz ketchup is of course aclassic that will live forever, but sometimes it’s good to have a ketchup with more taste to it, especially for spicy sausages and on burgers. In this one, a spicy fennel taste is what I’m going for. This recipe makes about 2 jars of delicious homemade ketchup.
Time: 60 minutes
Skill Level: Easy
You’re going to need:
8 smoked, roasted chillies
2 cans of chopped tomatoes (If you live in a part of the world with GREAT tomatoes, you can use fresh ones instead. Lucky you!)
0,5 cup tomato paste
2 tbsp rapeseed oil
6 tbsp apple cider vinegar
1 cup of brown sugar (I use the sticky kind)
1 tbsp worcestershire sauce
2 tbsp freshly ground fennel seed
1 tsp marjoram
1/2 tsp ground cloves
1 tbsp ground pepper
1 tbsp ground cumin
1 tbsp maldon salt
2 tbsp ground chili flakes

Fennel seeds
Put your smoked and roasted chillies with rapeseed oil in a blender, and blend to a fine paste. Combine with everything else in a saucepan, and bring slowly to a boil. Let it simmer for 45 minutes or until desired consistency is reached. Blend in batches until desired smoothness is achieved. Let it cool to room temperature before putting in containers and storing in the fridge. Sterilize your equipment and jars, seal them properly, and this kind of sauce will stay good for many months in your fridge.
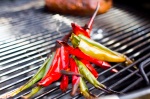
Here’s a great tip for smoking or roasting small pieces of vegetables or any other small things. Get some steel string from your local hardware store, and just string them up, like so. This worked great when smoking a bunch of chillies for my homemade ketchup.

Chillies stringed up on steel string
I make my own BBQ sauces. It’s fun, it’s a lot cheaper than buying them (at least here in Norway), and it means you can tailor the sauce to your particular tastes. I think it’s good to make as much as possible of my food from the ground up, because then I know what’s in it. Call me paranoid, but I don’t always trust the food industry to make the healthiest choices on my behalf… Also, it’s not a very difficult thing to cook. This is a sweet, tangy sauce with quite the kick to it. Which is just what I like for any BBQ beef dish.

Chillies stringed up on steel string and smoking on the BBQ
Time: 60 minutes
Skill Level: Easy
You’re going to need:
1/2 yellow onion
8 whole fresh chillies (I use some medium to mild ones)
1 tbsp rapeseed oil
1 cup apple cider vinegar
2 tbsp Dijon mustard
1/2 cup Worcestershire Sauce
2 tbsp freshly squeezed lemon juice
0,5 cups of good bourbon
1 tbsp ground cumin
2 tbsp paprika powder (preferably the Spanish, spicy variety)
2 tbsp freshly ground pepper
1,5 cups of brown sugar
2 tbsp of liquid smoke (not necessary if you smoke the onion and chillies)
Ideally, I like to smoke and roast the chillies and onion on the grill beforehand, I normally do this while BBQing something else. If you don’t have time for that, just deseed chillies, chop onion, saute in the rapeseed oil, and then put in a blender to make a smooth paste. Combine the paste and the rest of all the ingredients in a saucepan. Whisk once in a while and let it simmer for 30-45 minutes until desired consistency is achieved. Let it cool to room temperature before putting in containers and storing in the fridge. Sterilize your equipment and jars, seal them properly, and this kind of sauce will stay good for many months in your fridge.

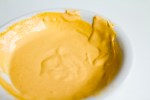
The finished sauce. I still draw at a kindergarten level, I know. Thanks.
Just some pictures from today’s BBQ-related cooking here at BBQviking’s house…


I get a lot of questions on which smoke wood to use for which foods. Here are some suggestions. Like anything else to do with BBQ, this is no exact science. And remember, what kind of rub or sauce you use and the spice level should also be part of the consideration.
Pork – Pork works well with lots of different smoke woods. I like to use almost anything for pork. I use mesquite a lot for pork, and I use apple (real good for ribs), cherry and pecan wood. Sometimes when I really want smoke taste on pork butts, I use hickory as well. Want something light? Try Alder.
Beef – Beef=hickory in my mind. Sometimes I’ll mix 50/50 hickory and mesquite. Oak is also good, the Jack Daniel’s oak wood chips are great for steaks for instance.
Poultry – For poultry I would normally pick something lighter, like cherry or apple. Sometimes I use mesquite, it can be real tasty with duck, which has a stronger, more gamey taste than chickens
Fish – Oak or alder is very popular for smoking fish. Here in Norway the juniper bush is sometimes used, but I find the taste too owerpowering.
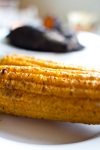
Vegetables – Since they’re not the stars of the show, my vegetables usually get smoked with whatever I’m using for the meat. Hickory and mesquite is great for baked potatoes and ears of corn (prick the potatoes with a fork first).
Lastly, experiment. A lot. It’s the only way to learn what’s best for your tastes. There’s also other ways to make smoke, rosemary smoke from fresh rosemary for lamb for instance. Vines of various kinds can also be used. But don’t use fresh wood, it needs to be dried. Nothing green should go on the grill as smoke wood.
